This is the fourth article in the StoneFly Storage Concentrator Series. The series was created to help users understand how to use the StoneFly Storage Concentrator Virtual Machine™ (SCVM) and how it can help storage administrators manage system operations.
This post guides users through the process of deploying different segments of the StoneFly Storage Concentrator Virtual Machine™. The previous article discussed how volumes can be expanded in the StoneFly Storage Concentrator Virtual Machine™.
This article will cover how you can restore encryption USB device in SAN. It also explains how to setup an encryption USB drive check scheduler. We allow data encryption for the volume security and the volumes cannot be excessed without the encryption keys therefore the encryption keys should not be lost.
Restoring the Encryption Keys to your USB drive
The USB drive holding encryption Keys may be lost or damaged. The Storage Concentrator does not function properly if the Encryption Keys are missing at boot times and other volume configuration points. The Storage Concentrator User Interface allows a non-encrypted USB drive to be formatted and rebuilt as the official encryption USB drive. The non-encrypted USB drive is identified on the System->Admin screen. The USB drive status states that the current USB drive does not contain the encryption information for this Storage Concentrator’s volumes. Once that status is encountered, the USB drive may be rebuilt to contain the encryption information for this Storage Concentrator. The rebuild/repair process requires the Passwords that were used to create the individual volumes. Without these passwords the USB drive cannot be restored.
Steps to restore the Encryption USB drive:
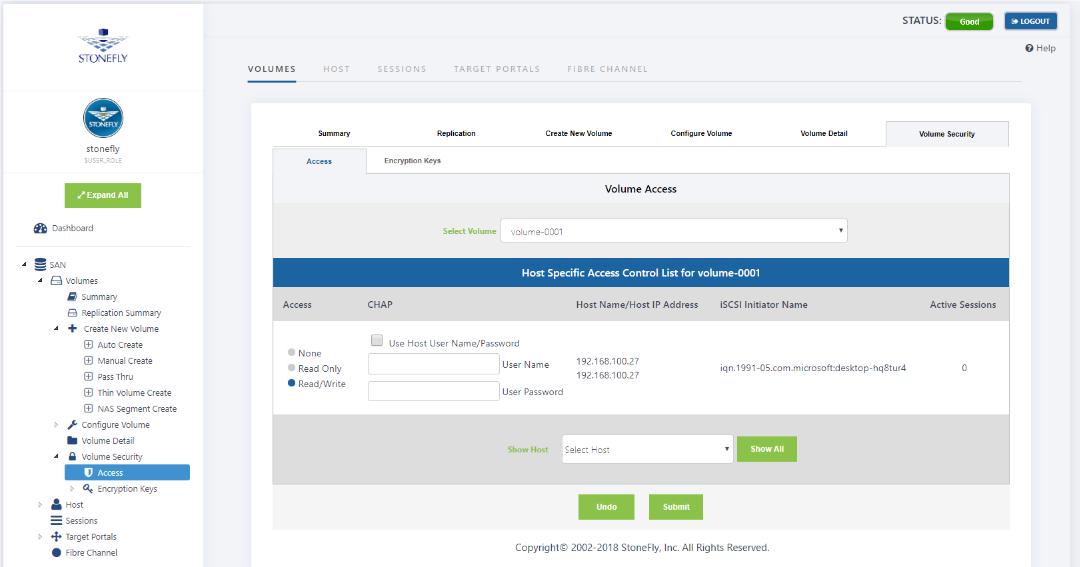
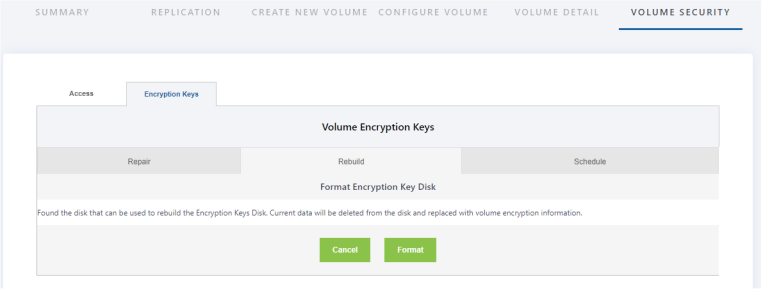
1. Navigate to the Volumes->Volume Security screen. The default screen contents refer to assigning the volume to a specific host. The screen includes a tab for the “Encryption Keys”. Clicking this tab initiates the USB drive rebuild/repair process, or checks for USB drive presence in the system. The “Rebuild” button has to be used to restore a USB encryption drive by using a new USB device if the old one is not available for some reason. The “Repair” button repairs an existing USB encryption drive if the drive does not have valid encryption information for some of the encrypted volumes.
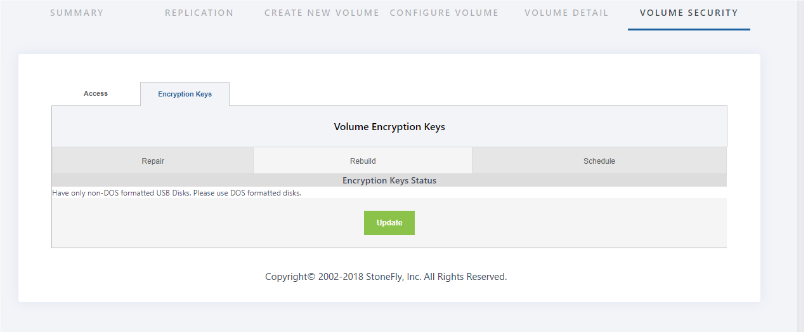
3. Insert the “USB device” into the system. Make sure the “USB device” is connected to the VMware ESXi or Hyper-V hypervisor where the SCVM™ is deployed. The “format” button option will format and empty the USB drive. This prepares the USB drive to hold the new encryption information. Click on the “Format” button to start the formatting process.
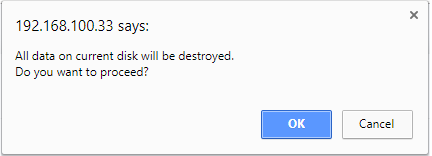

5. After the formatting process is complete, the screen will be updated to show the first encrypted volume in the Storage Concentrator. Type the correct password in the Password edit field and click on Submit to rebuild the first encryption key. Each different encrypted volume is displayed in a similar screen. Enter the proper password for each volume as they appear in the screen as shown below.
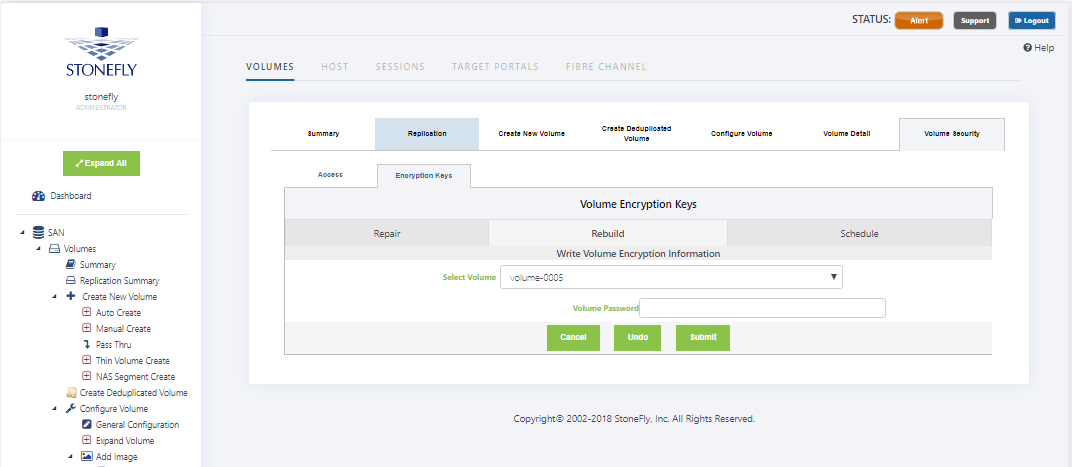
If the entered password matches the original password, the correct data is placed on the USB drive. If the entered password does not match the original the following message is displayed. Click OK and try again.

If the original password is not known or found by the time of the next reboot of the Storage Concentrator (such as a software upgrade), the volume will become unusable. Therefore, we strongly encourage users not lose the list of passwords! It is emphatically advised that users make copies of the USB drive!
Encryption USB Drive Check Scheduler
The USB drive holding the Encryption Keys should be present in the system only when encryption volume has to be created or deleted or in case a stand-alone Storage Concentrator has to be rebooted. Most of time the drive should to be stored in a safe place away from the Storage Concentrator. Users can set the scheduler to check for drive presence. If the USB drive is present the scheduler has to generate log message with critical severity level. Users can establish notifications that retransmit all messages with this severity through E-mail or SNMP.
Steps to manage the Scheduler for Checking for the USB Encryption USB Drive:
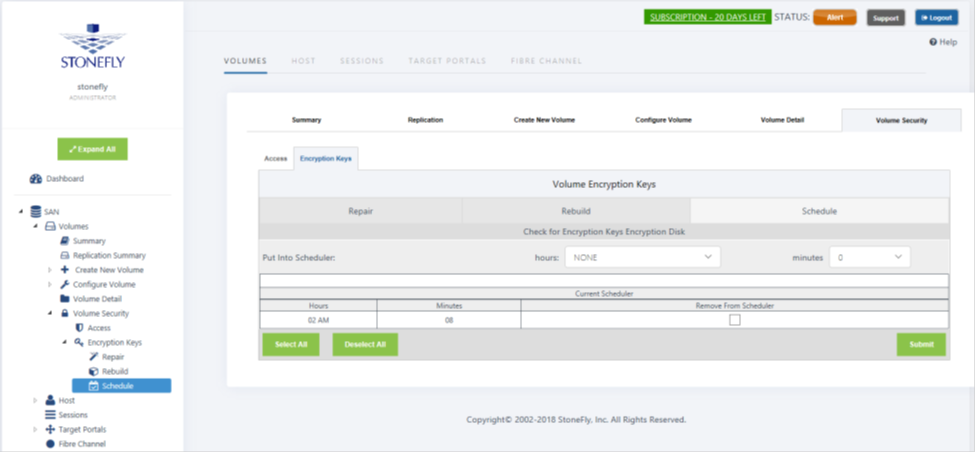
- Navigate to the SAN > Volumes > Volume Security > Encryption Keys > Schedule Screen
Select the hour and minutes from the pull down menus and click the Submit button to set the time schedule. To delete the schedule, click on the check box under Remove From Scheduler and then click on the Submit button.
This concludes the section of setting up volume security in SAN storage. The article discussed about the encryption keys restore in USB drive, as they are important to access data. The next article will be discussing about volume configuration. The step by step process will be explained. If you have any queries you can contact us.
![HowtorestorelostEncryptionkeysinanUSBdriveusingSCVM[1]](https://staging.stonefly.com/wp-content/uploads/2018/06/How20to20restore20lost20Encryption20keys20in20an20USB20drive20using20SCVM1.jpg)


