With Veeam Availability Suite v10 release, Veeam added support for NAS backup repositories. Now, Veeam users can leverage NAS volumes to store backup files, VM backups, and replicas. As a Veeam TAP alliance partner, we make it easy and seamless for our customers to provision and integrate NAS volumes with Veeam.
Veeam backup & replication has supported backups from, and restores directly to, NAS natively for a while now but backing up to a NAS volume was always a bit of a challenge. Prior to v10, users had to configure Linux machines that acted as middlemen.
With the v10 release, the process no longer requires the Linux machines. In typical Veeam fashion, it’s a simple wizard-driven process to setup and add NAS volumes; similar to other supported backup repository types.
Need help? Get free premium Veeam support today!
How to create NAS volumes
To create NAS volumes, we’ll be using StoneFly’s 8th gen patented storage concentrator (SCVM).
StoneFly SCVM comes preinstalled on all StoneFly HCI appliances (USS, USS-HA) and backup and disaster recovery solutions including our Veeam-ready backup and DR appliance (DR365V); it’s also available as a standalone virtual storage appliance compatible with VMware vSphere, Microsoft Hyper-V, KVM, Cirix (XenServer), and StoneFly Persepolis hypervisors.
Step 1: Purchase, Install & Login
To purchase StoneFly SCVM, go to https://staging.stonefly.com/subscription. Get a 30-day free trial to test things out and/or buy a monthly, yearly, or a custom subscription as needed by your projects.
Once the purchase is complete, you’ll get an email with the license key and a download link. You can also download SCVM guides and OVAs from: https://staging.stonefly.com/scvm-downloads
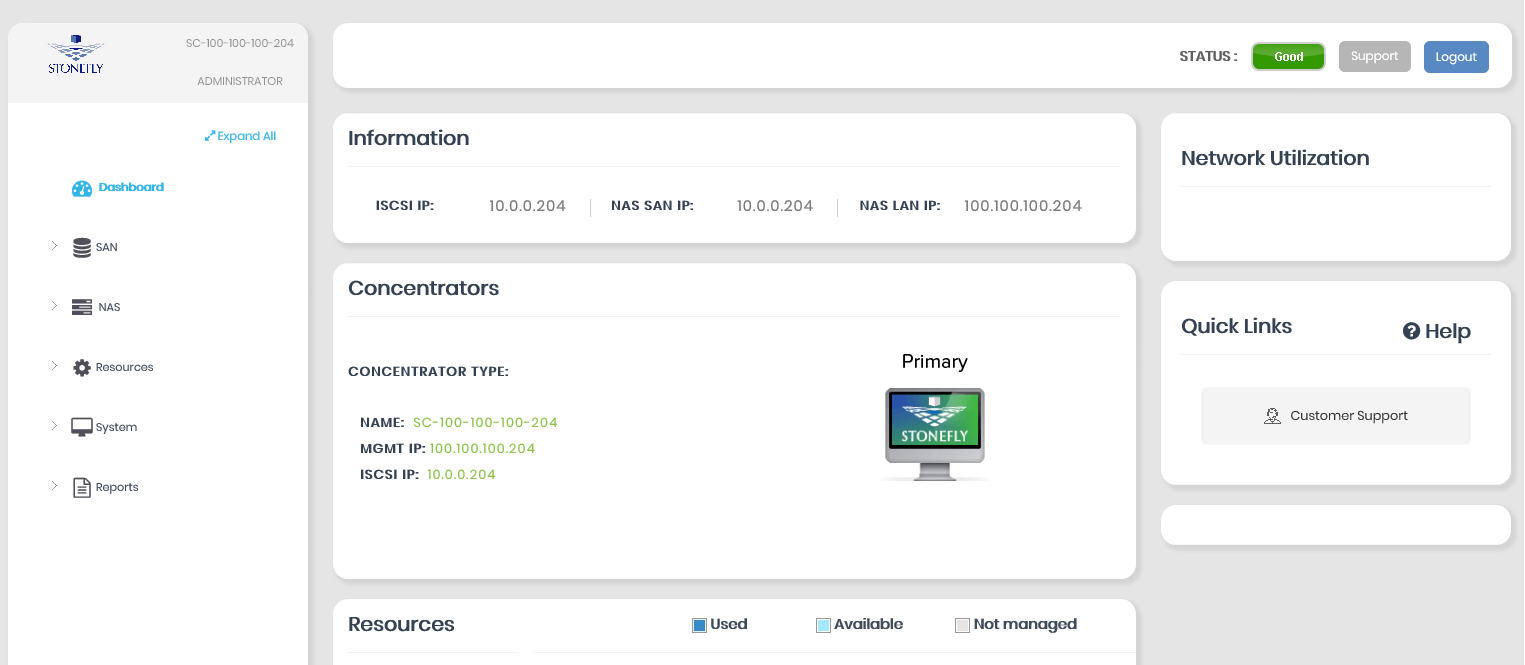
After install, you can log in to the SCVM GUI console via the preconfigured management IP address using any standard browser (Internet Explorer, Google Chrome, Mozilla Firefox, etc.).
After successful login, the following dashboard page will appear:
Step 2: Create NAS Segment
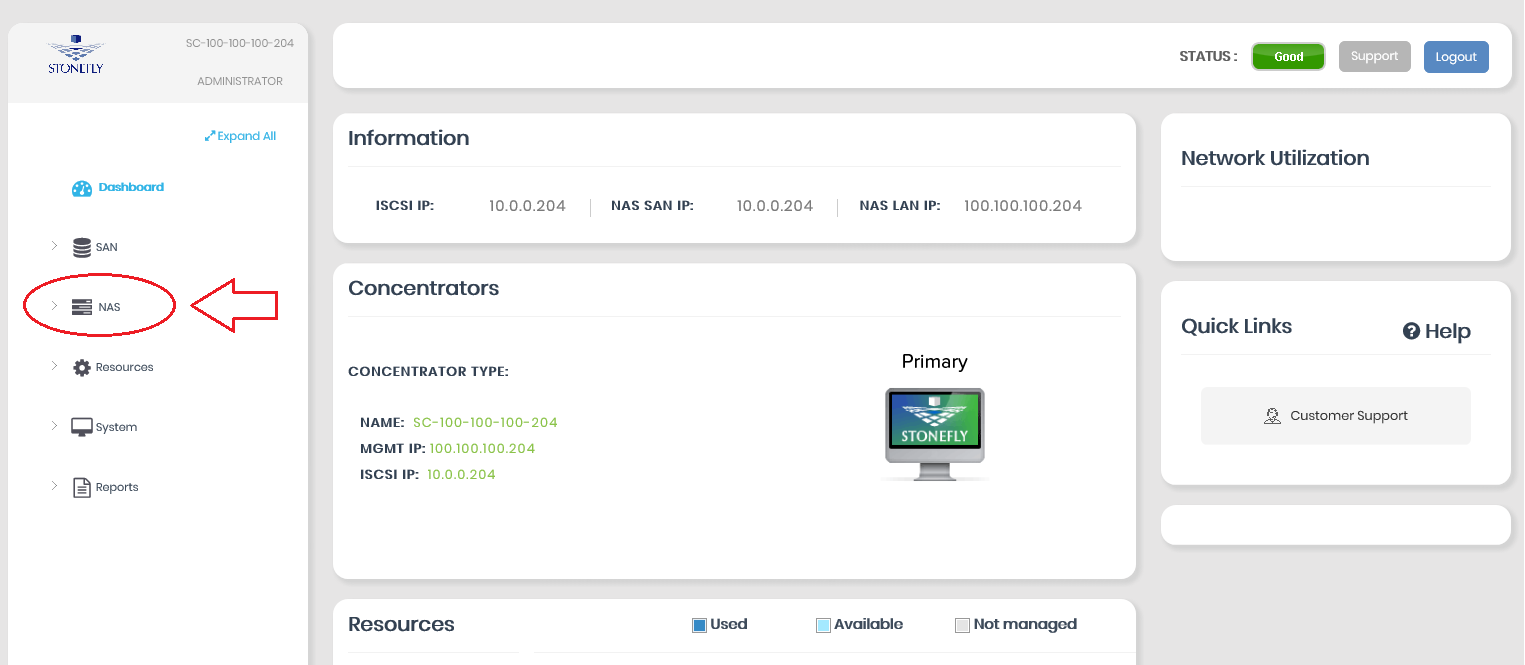
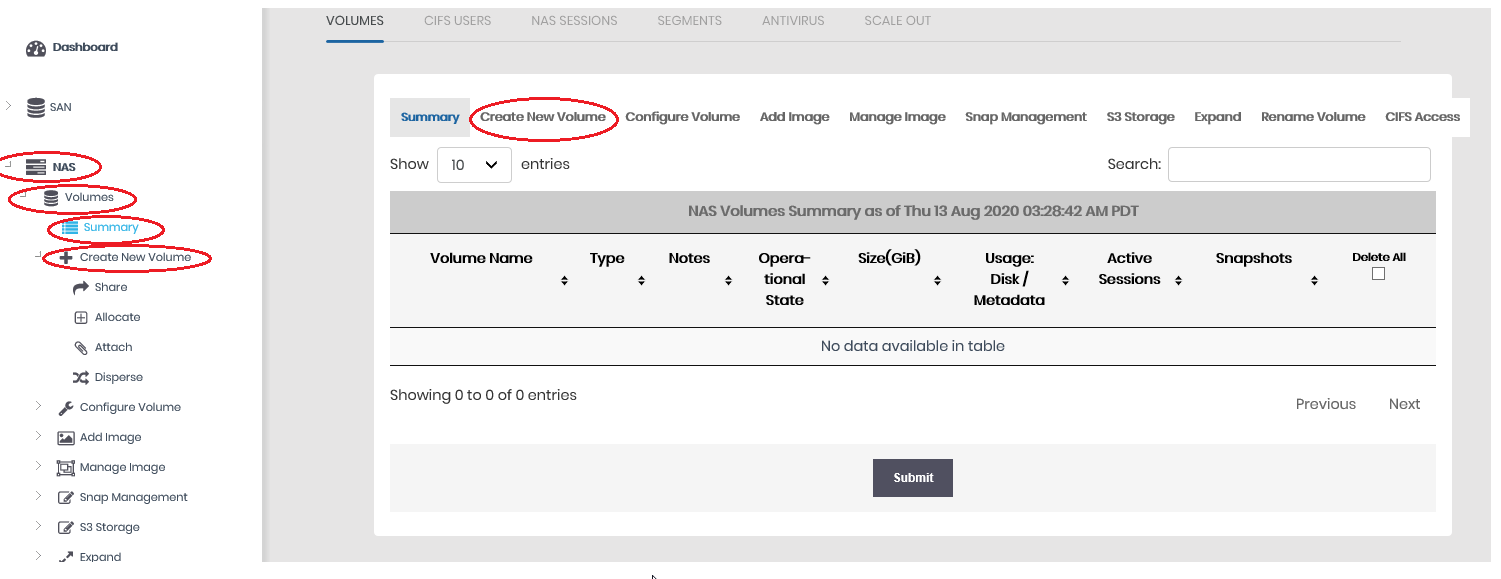
On the left-hand menu, click NAS to expand the list.
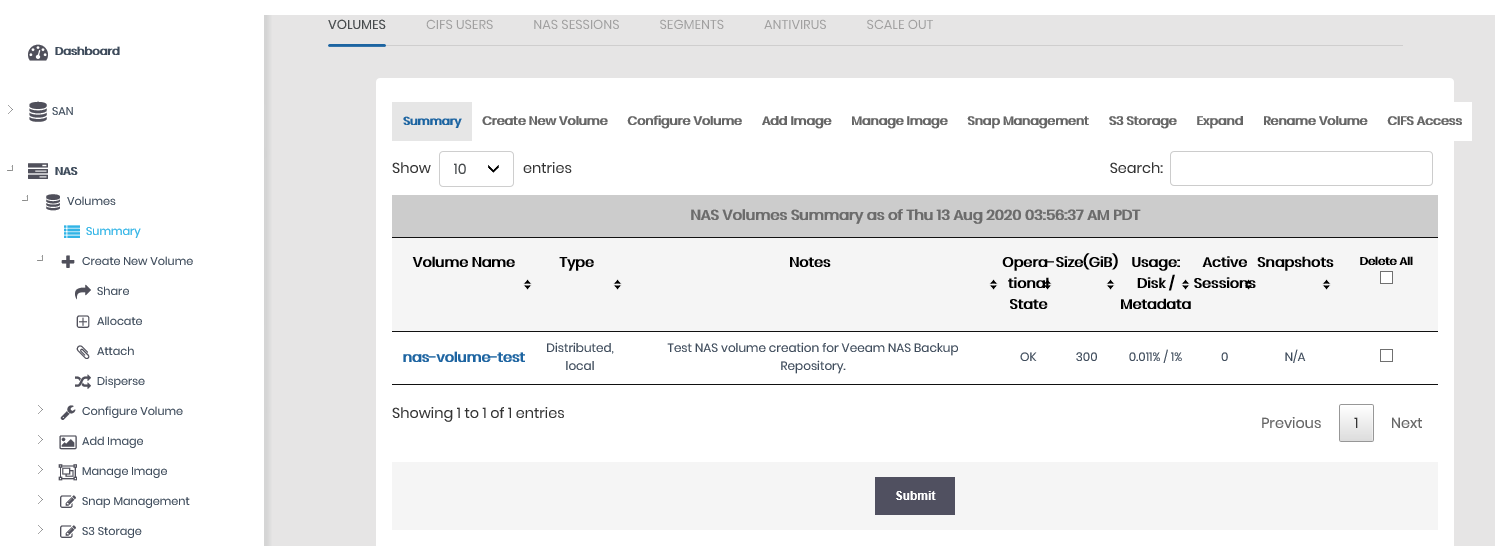
From the list, click Summary.
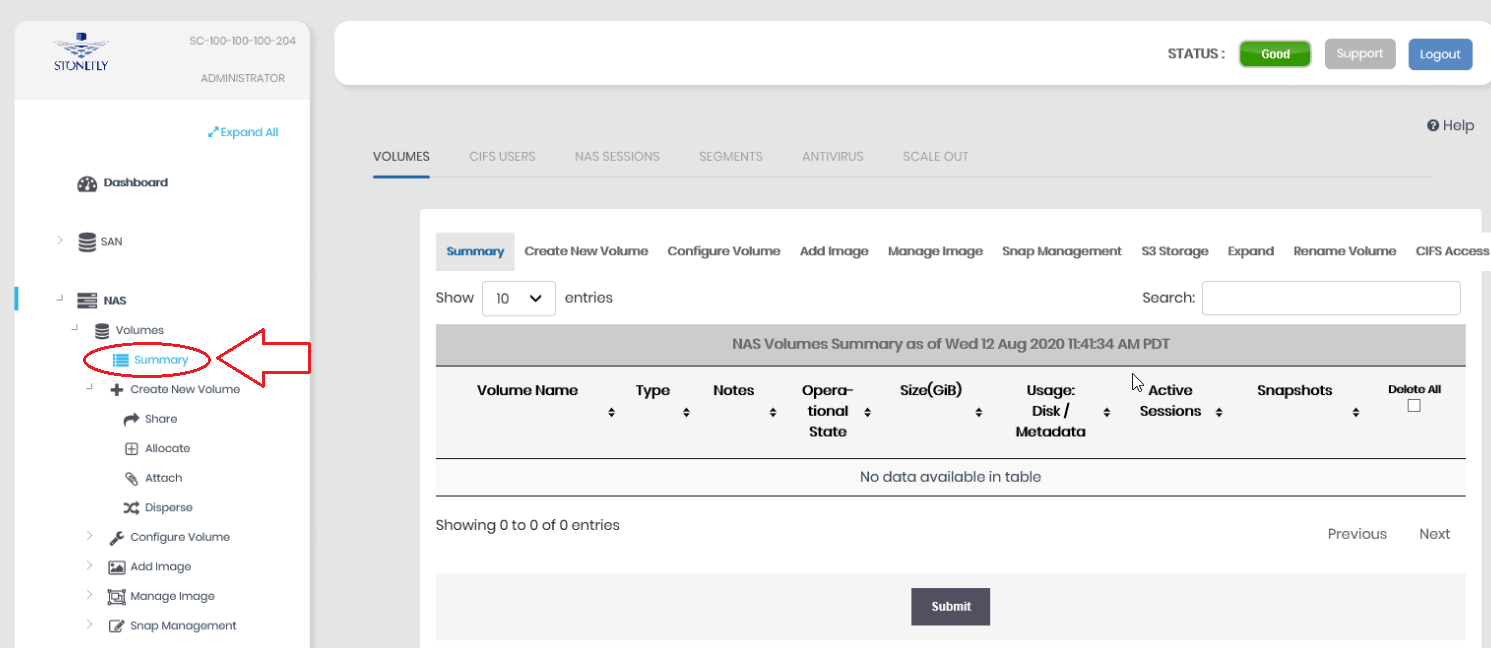
This will show you a brief summary of all the configured NAS volumes. As you can see in the screenshot below, currently no NAS volume(s) have been created.
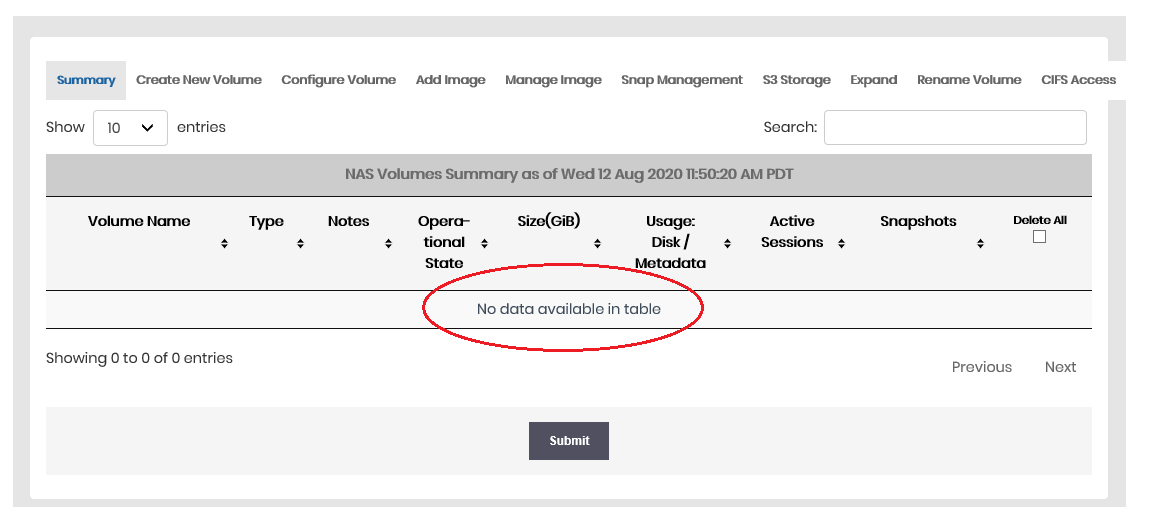
In order to create the NAS volume(s), first you will need to create a NAS Segment.
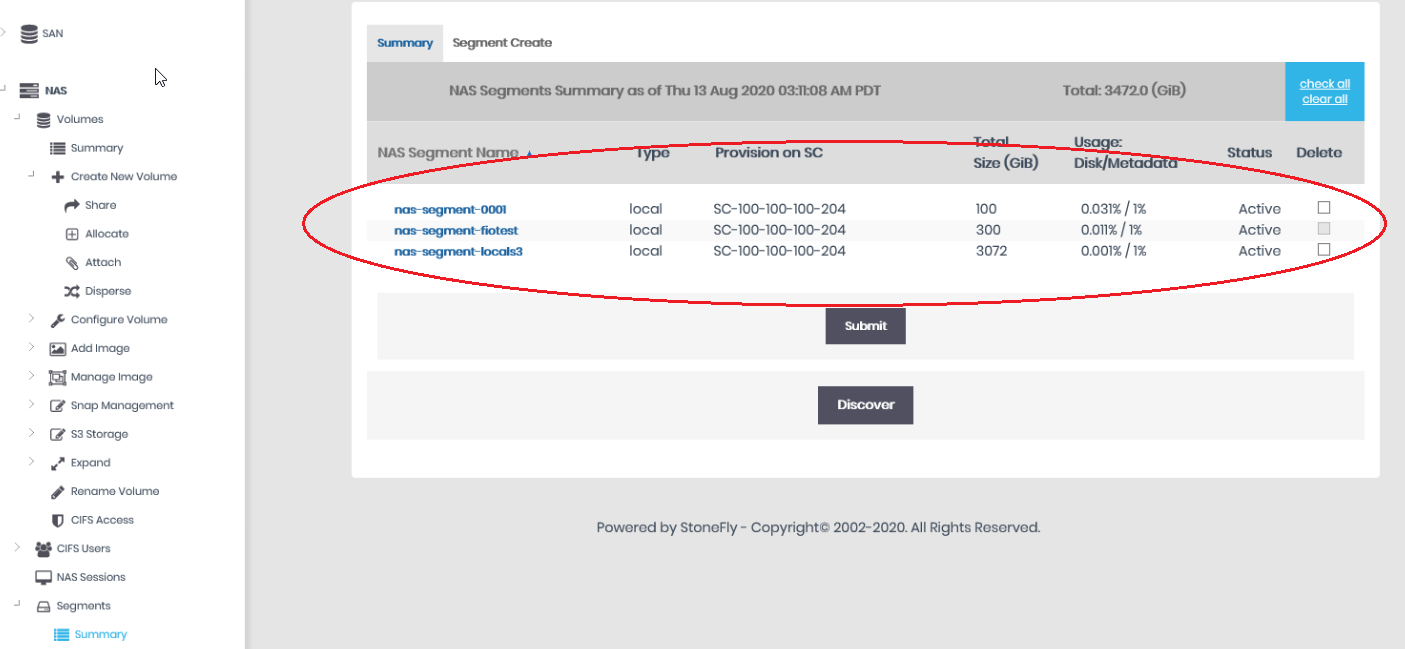
In the screenshot below, you can see some NAS segments configured previously. Let’s go through the process of creating a NAS segment with StoneFly SCVM.
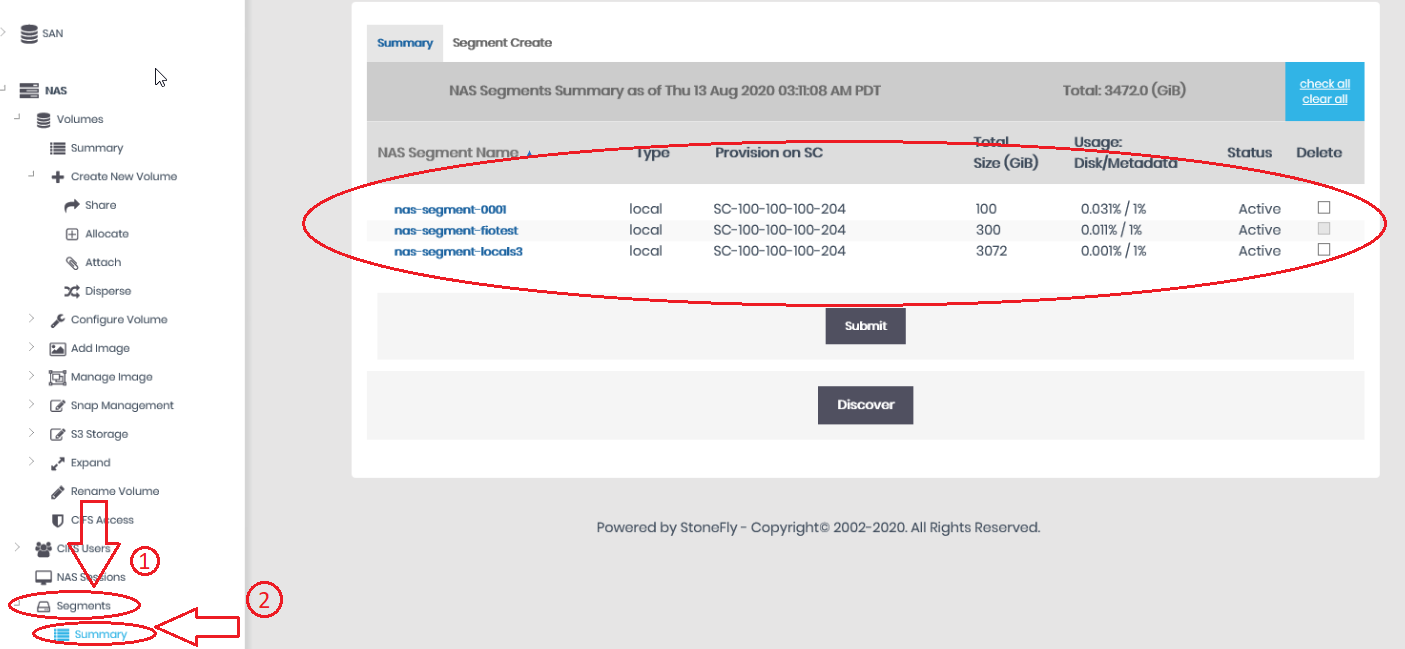
Click on Segments (1) in the left-hand menu and then click Summary (2).
Click the Segment Create tab at the top of the summary.
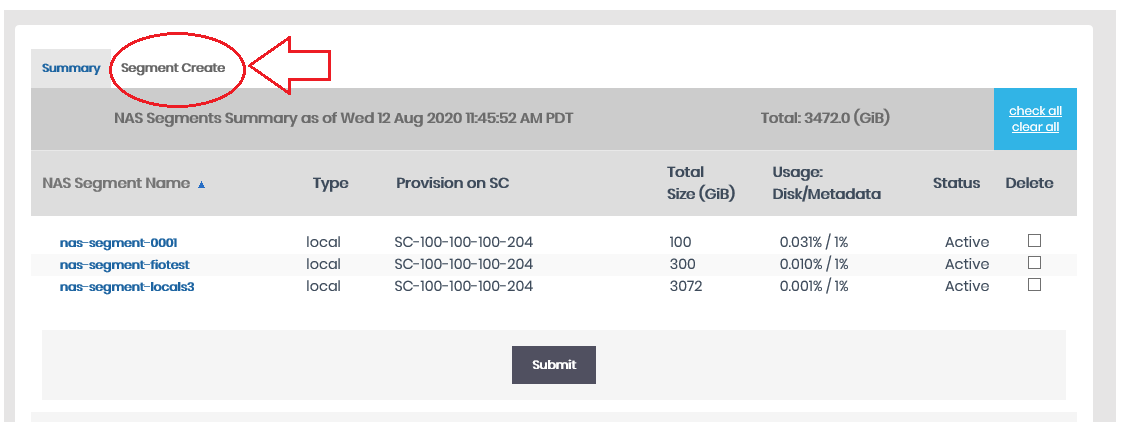
This will open up a form as follows:
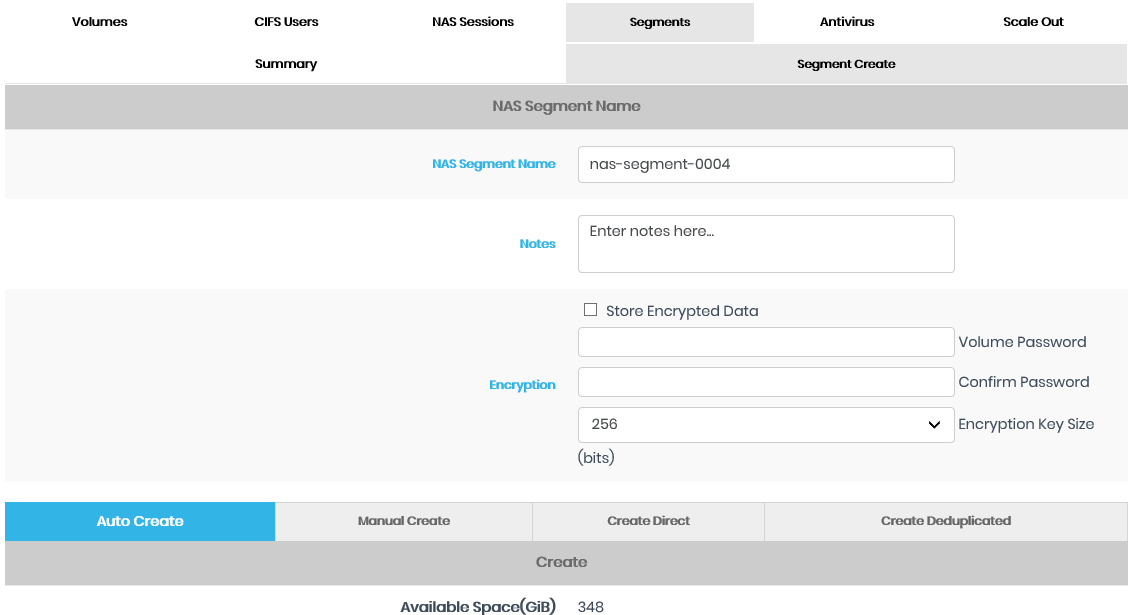
Fill the form as needed. For reference, here’s how we filled it for the test NAS segment:
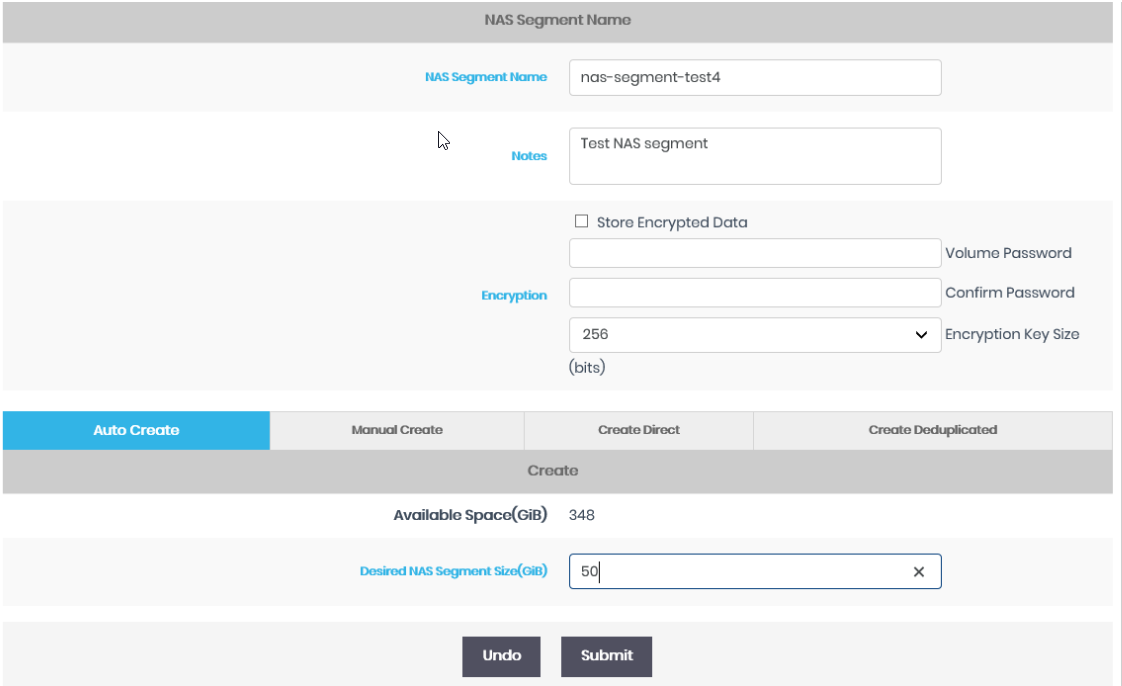
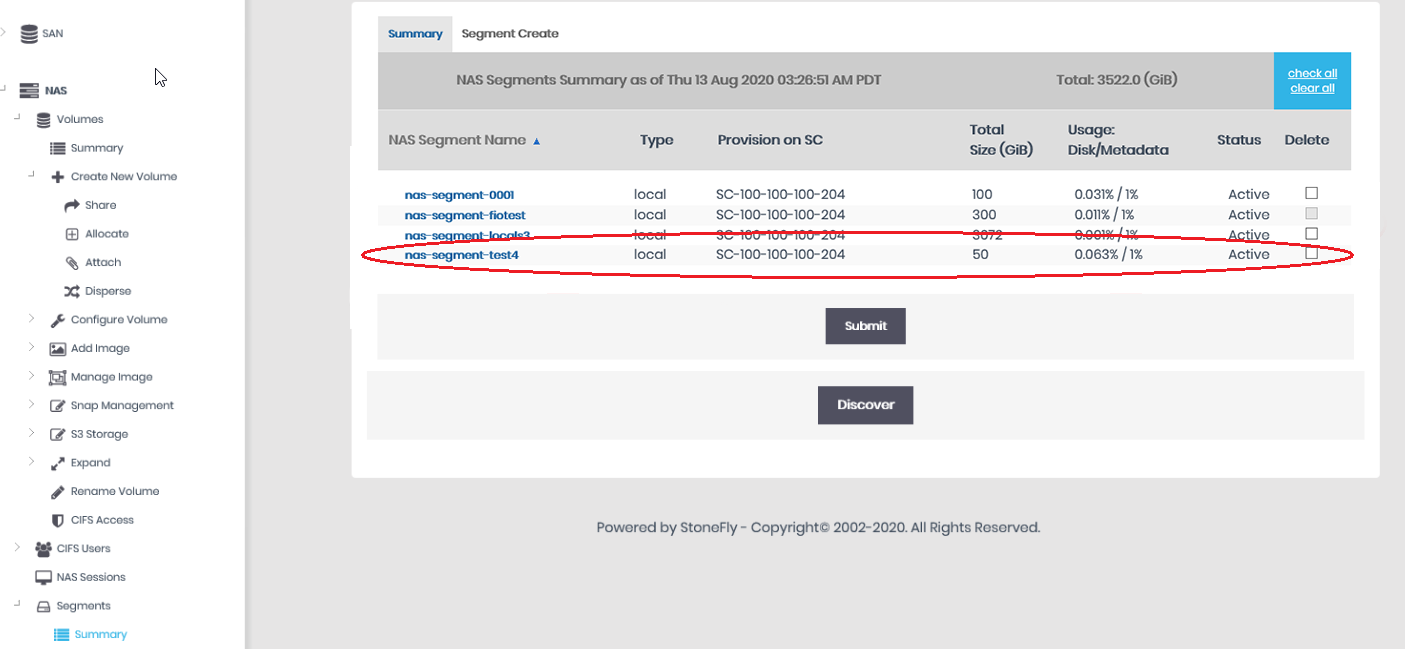
After you press Submit, the new NAS segment will be created. It will be shown in the summary under segment option in the left hand-side pane of the Dashboard.
Step 3: Create NAS Volume
Now that you’ve created a NAS segment, you can create the NAS volume. To do so, click NAS, then from the list select Volumes, and then click Create New Volume.
Alternatively, you can click on NAS, select Volumes from the list, then click Summary, and then click Create New Volume tab next to Summary in the table.
Click the Allocate tab, and fill out the following form in the Create New Volume section.
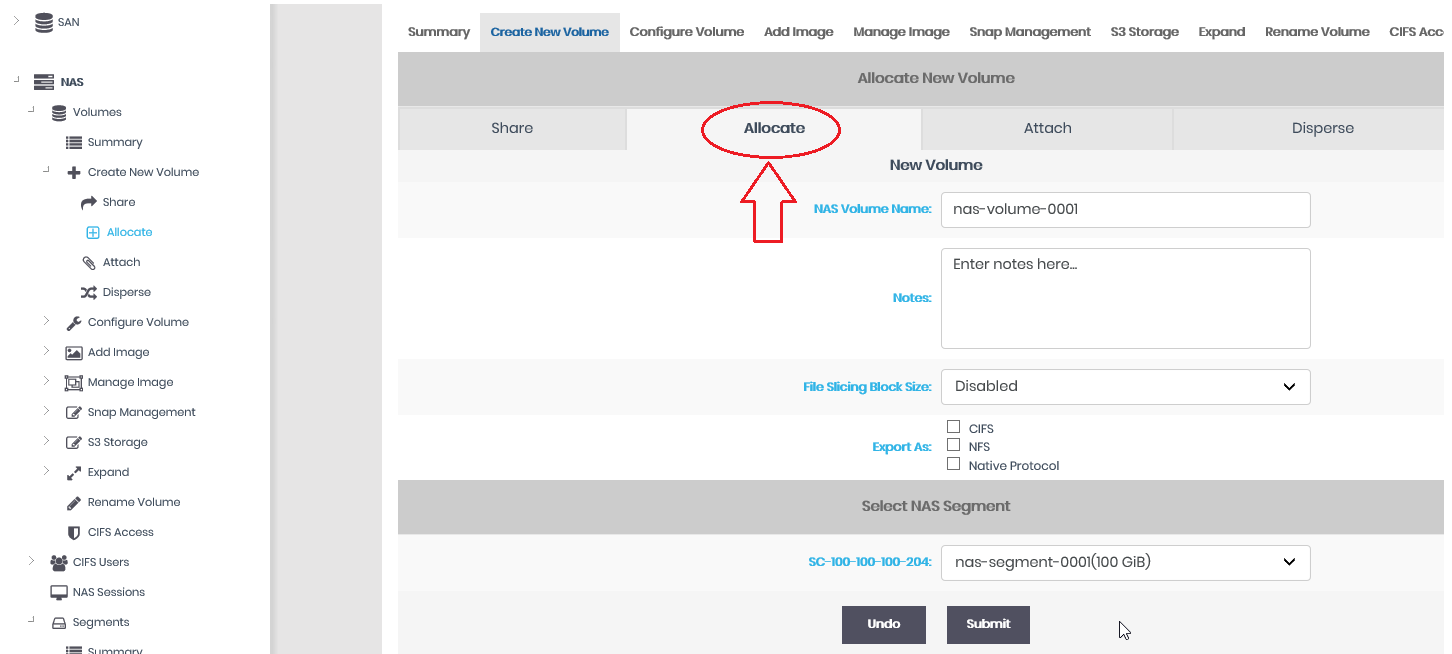
Here is an example of the form we filled to create the NAS volume:
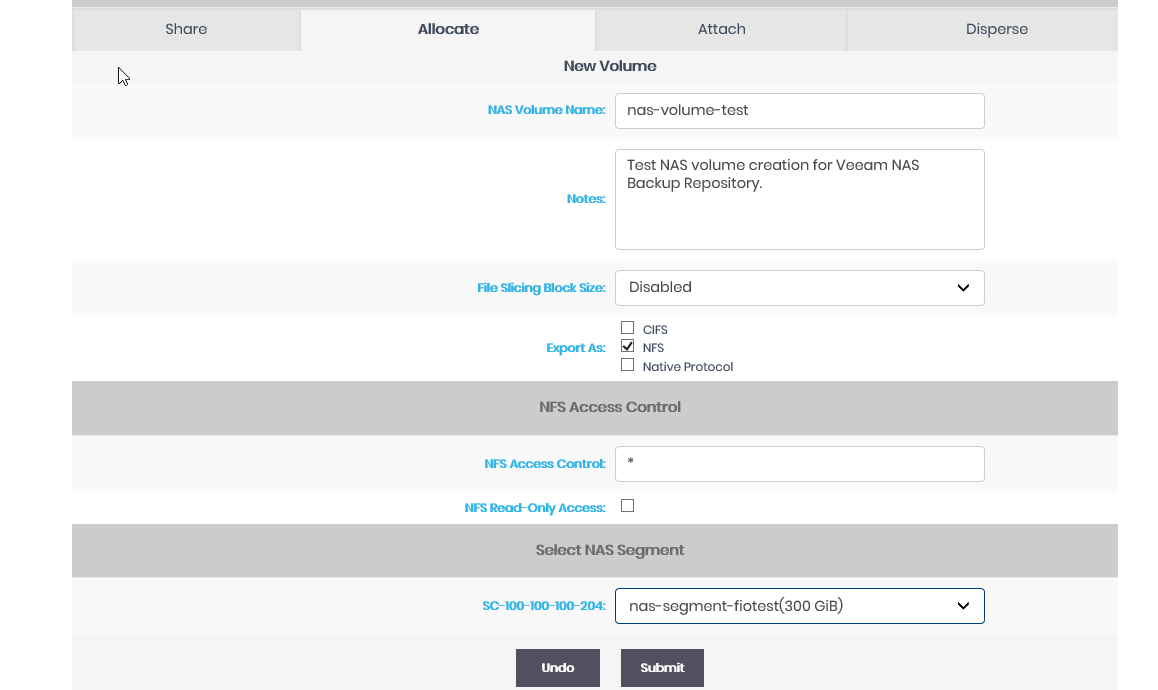
Also, select the export option for the volume. In this case, we’ve exported the NAS volume as NFS and the NFS client 10.0.0.203 has been given the access to the volume
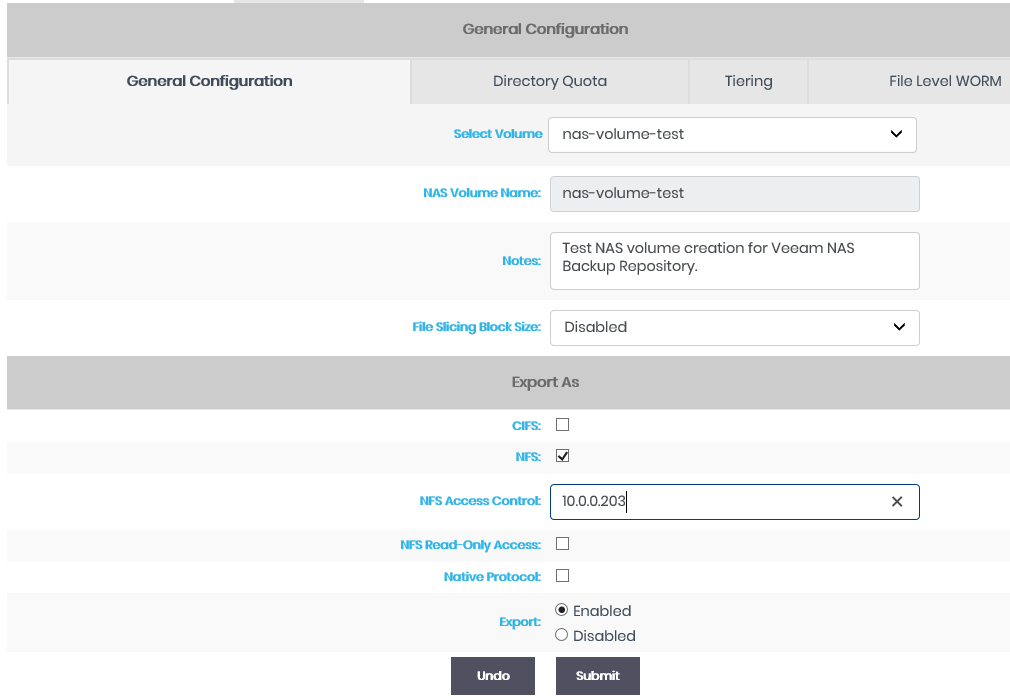
After you click Submit, the new NAS volume will be created and listed in the Summary section under NAS > Volumes.
Why use SCVM to provision your NAS volumes
StoneFly storage concentrator (SCVM) also offers an array of data protection and storage optimization features, and advanced data services along without any additional charges.
In other words, while you can provision NAS volumes using a number of different software, you still need third party plugins or additional licenses to setup features like snapshots, deduplication, air-gap volumes, encryption, etc. whereas SCVM comes with all of the following features making NAS volumes more secure, fast, and affordable.
Data Protection Features:
- Air-gap repositories, and controller.
- Immutable storage (file and S3 object)
- Immutable delta-based snapshots
- Hardware-enabled encryption
- Anti-ransomware
- Threat scan for dormant malware
Storage Optimization Features
- Optional deduplication for NAS volumes
- Automated storage tiering
Advanced Data Services
- Sync & Async replication
- Cloud connect to Azure, AWS, and StoneFly private cloud
- Real-time reporting of network, bandwith, CPU, and system memory usage.
Learn more about StoneFly SCVM and it’s features: Download Brochure.
How to configure a NAS volume as a Veeam backup repository
Veeam backup repository is simply a storage location where the Veeam backup software stores keep backup files, VM copies and metadata for replicated VMs.
Let’s walkthrough the process of configuring NAS volumes as a Veeam backup repository.
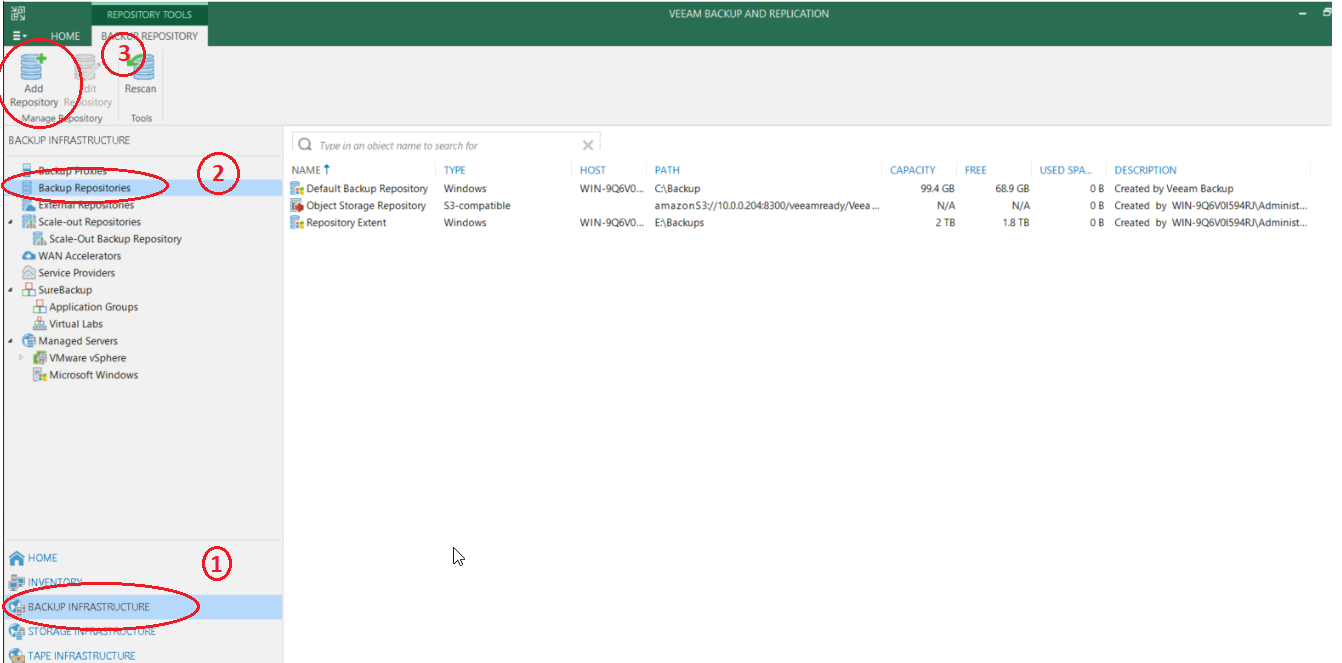
After opening the Veeam console, to add the new NAS volume for backup repository, click Backup Infrastructure at the bottom right, and then click backup repositories from the left-hand menu. To add the repository, click Add Repository in the top right.
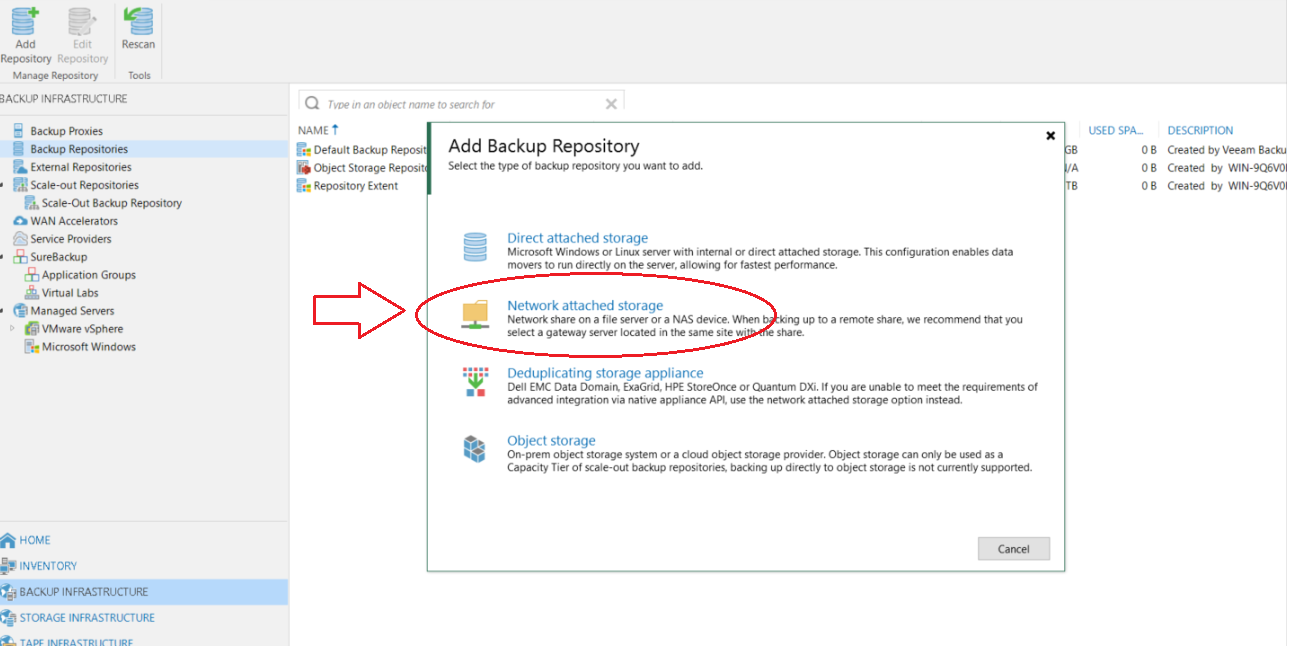
Note: A new dialogue box opens.
Click Network attached storage.
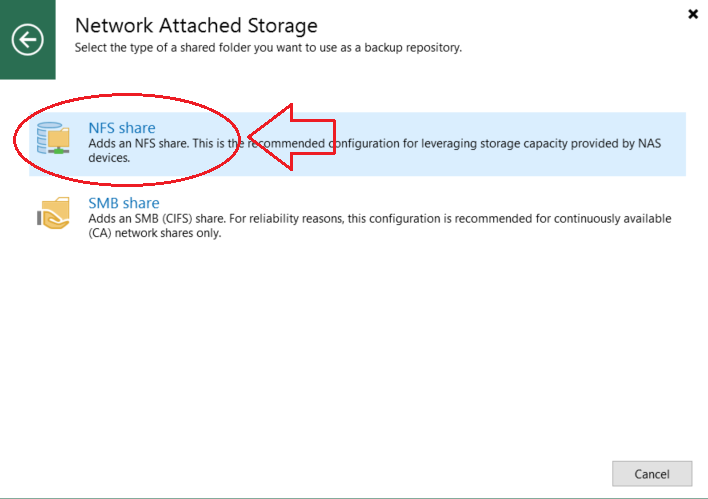
Click NFS share.
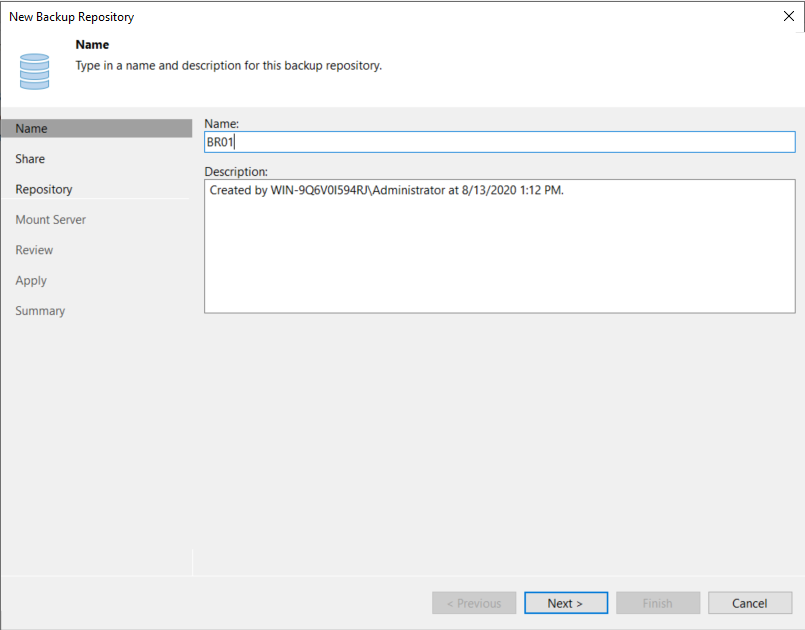
Name the repository. It is recommended to use a naming convention. You can also write a description for the repository as well.
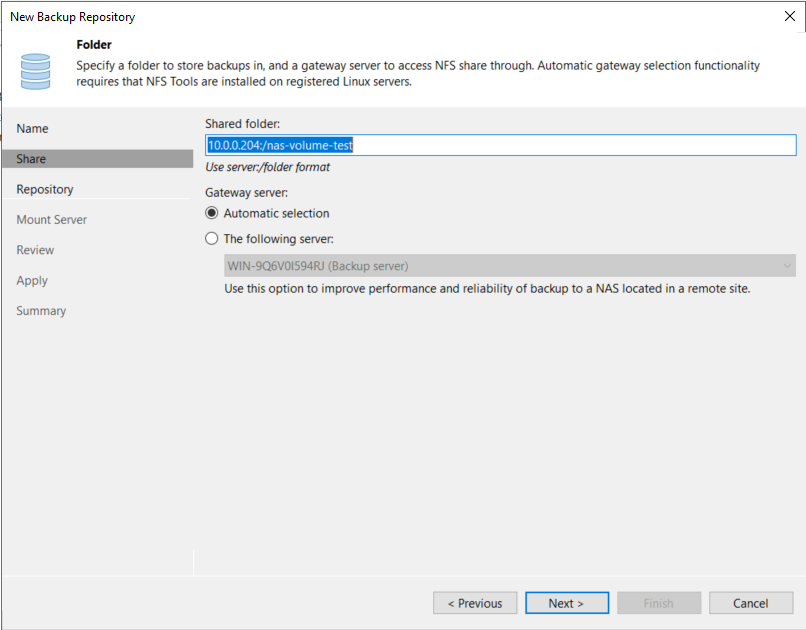
In the next step, you will need to enter the path to the NFS shared folder. To communicate with the NFS share, Veeam software needs to deploy an NFS gateway server. This is because an NFS share cannot host Veeam data movers by itself. The Veeam backup server will automatically deploy a Veeam data mover onto the specified gateway server machine.
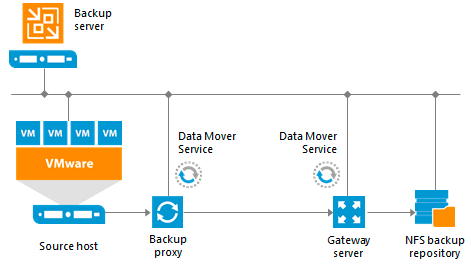
We can use the Veeam Backup & Replication server (itself) or we can specify another machine for this task. The role of the NFS gateway server can be assigned to either a Microsoft Windows or Linux OS machine (physical or virtual).
Note: An NFS Gateway server has different requirements from a Veeam Gateway Server.
If the network connection between the source data store and backup repository is fast, it is generally recommended to choose Automatic selection for the gateway server. If you’re performing backup and replication over WAN or slow connections, it’s recommended to select a server that is on the target site using the The following server setting.
If you decide to add more NFS shares, it’s worth configuring additional NFS gateway servers for the new NFS shares to ensure that a single gateway server does not become a bottleneck.
The ability to deploy an NFS gateway role to a machine is one of the key advantages in Veeam Backup & Replication v10, as earlier versions of Veeam did not have this NFS gateway role, organizations were required to manually mount NFS shares on Linux servers and configure the repository using the Linux repository type.
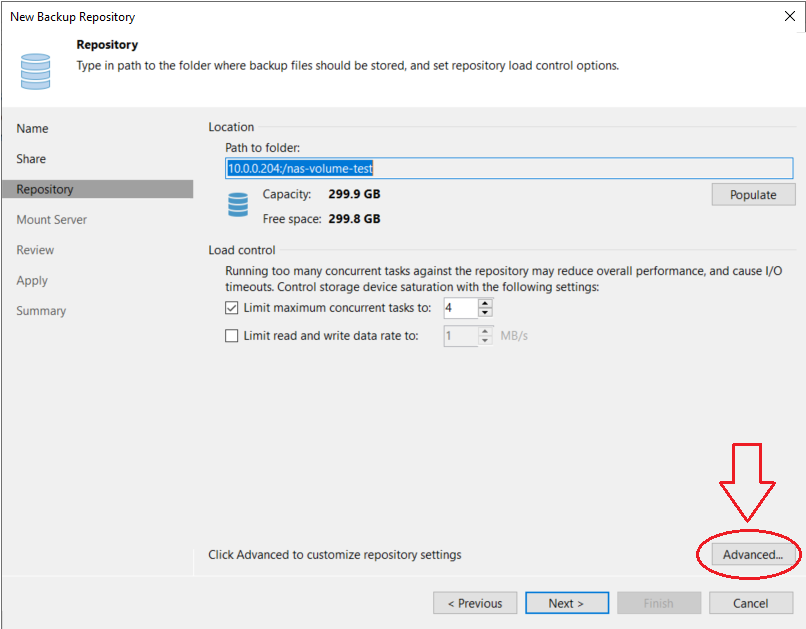
Veeam recommends keeping the load control setting enabled, as it prevents overload and job failures.
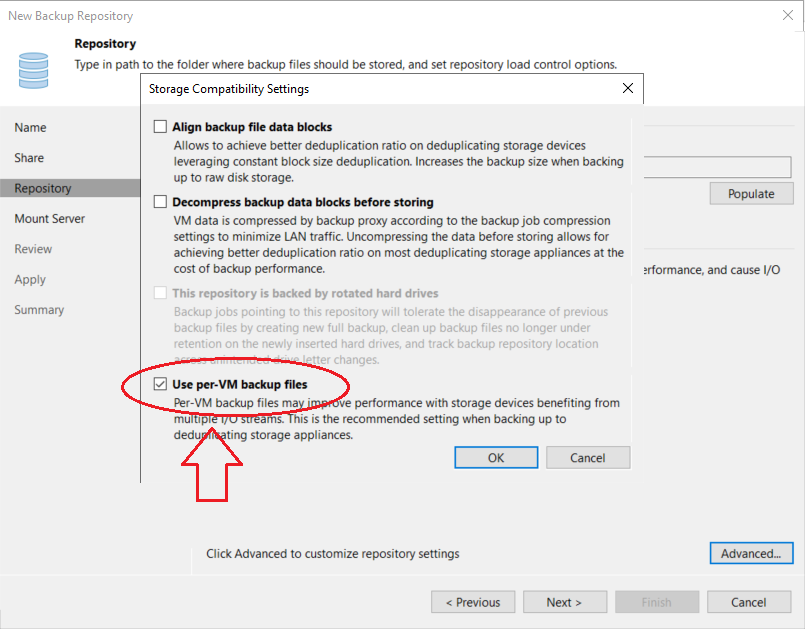
Click on Advanced.
By default, backup jobs write VM data to the backup repository in one write stream, and store data of all VMs to the same backup file.
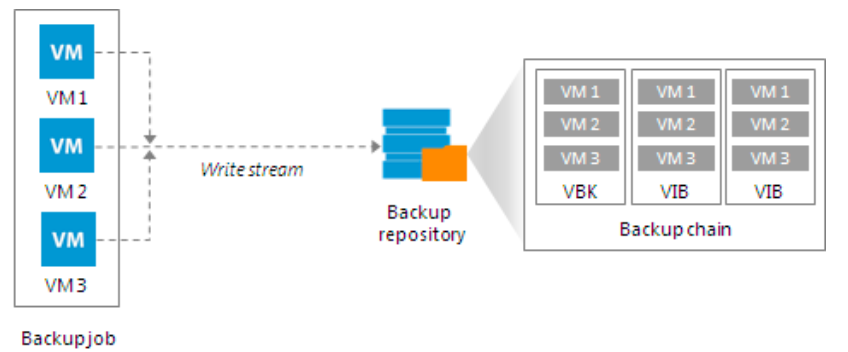
Such behavior is non-optimal for the Storage Concentrator because the SC is capable of writing data in multiple streams simultaneously.
If we disabled this setting, the backup repository may become a bottleneck for the data transfers, even though its resources will not be fully utilized.
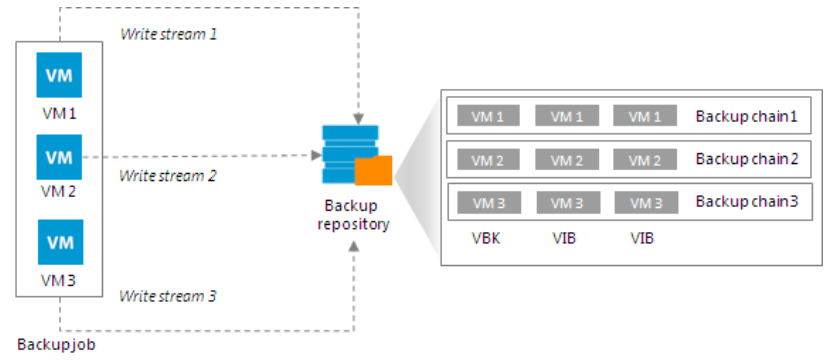
To ensure the best performance, knowing that the storage device such as StoneFly SC can handle multiple write streams, we’ll enable Use per-VM backup files on the backup repository.
In this case, the Veeam backup job will use a separate write stream for every VM in the job, and store data of every VM to a separate backup file. Resources on the SC storage device will be used more efficiently, and the job performance will increase.
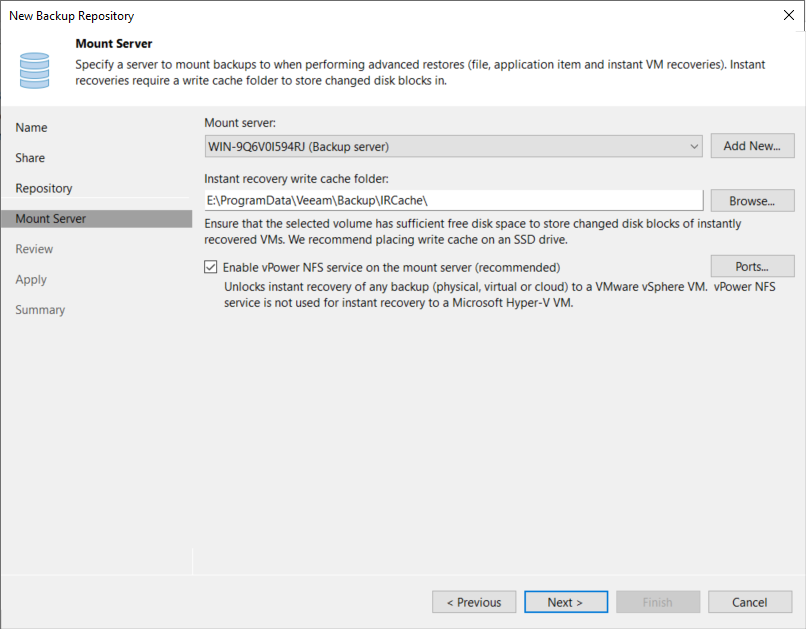
In the next screen, you will be prompted to specify which machine to use as the Mount Server.
During the restore process, Veeam backup & replication will mount the VM disks using the backup file stored on the backup repository to the mount server. It is always recommended to select a mount server that is as close to the NFS share as possible. By selecting a machine close by, the VM data will not have to travel over slow networks such as WAN links; and the restore process will be fairly quicker.
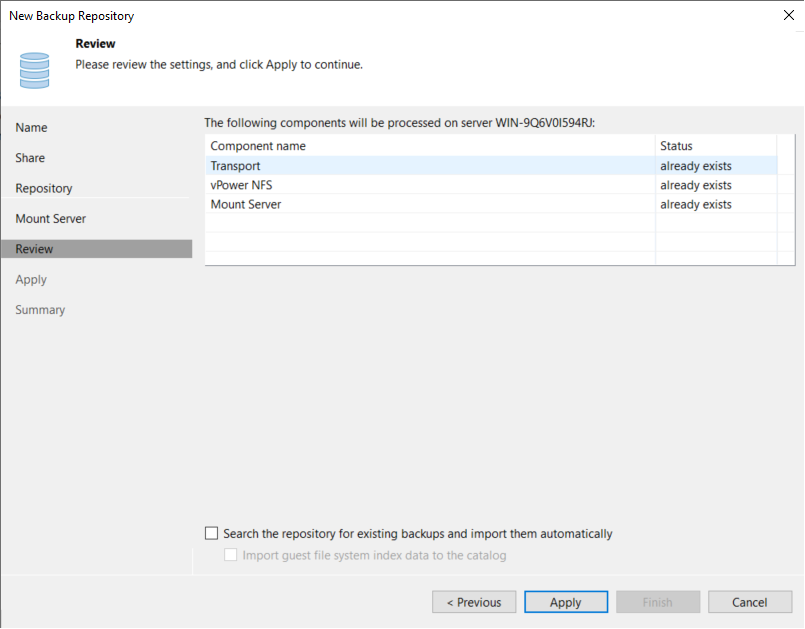
At this stage, you can review the backup repository settings and click Apply to create the NFS backup repository.
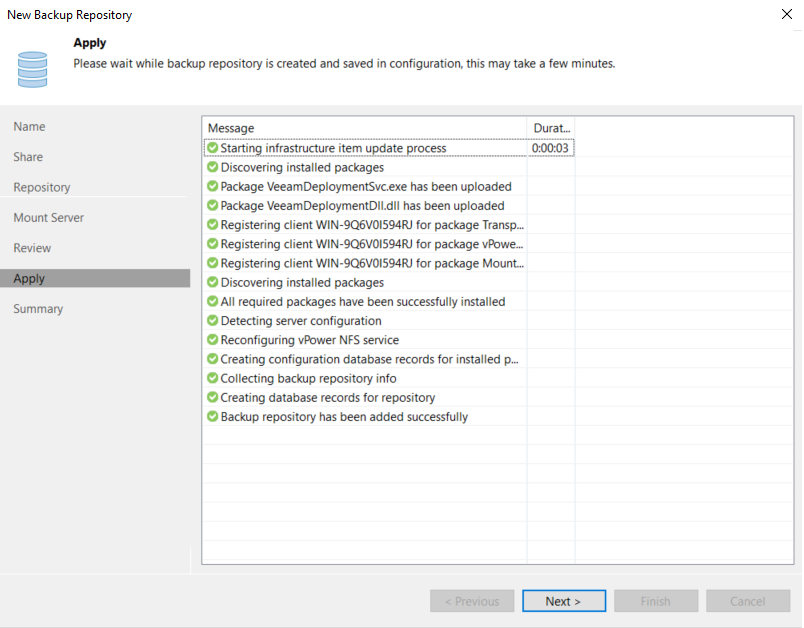
When you click Apply, the software will display the details of each step being performed.
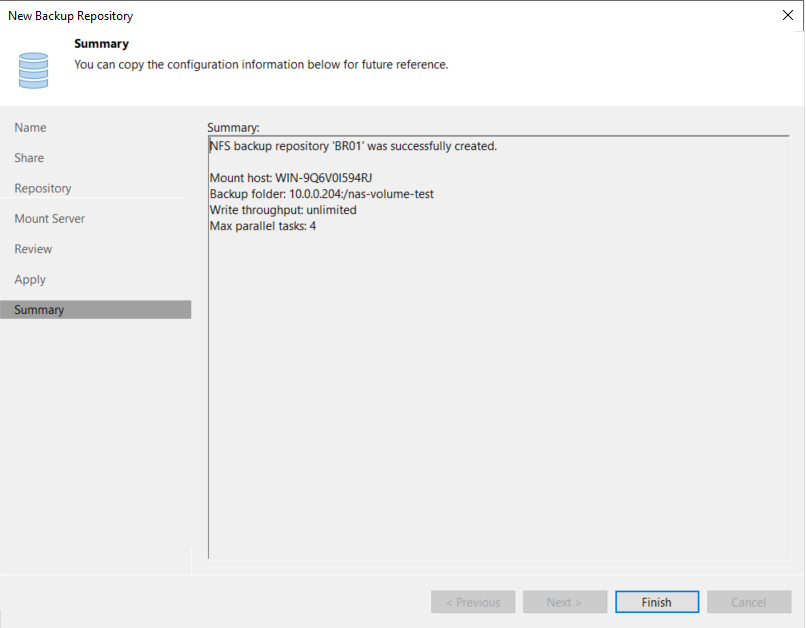
Upon completion, you will see the following message indicating that the NFS share has been added as a Veeam backup repository.
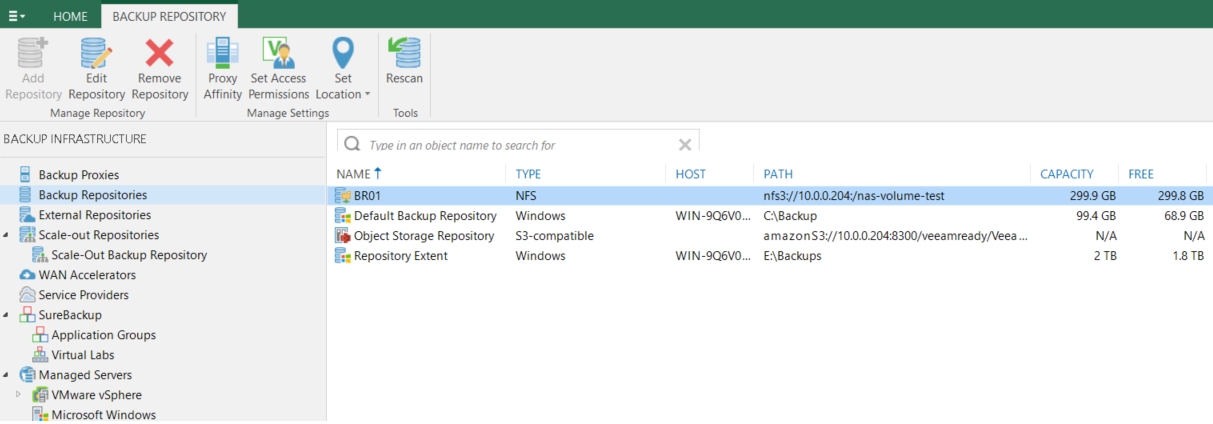
Your new NFS share backup repository is now ready to use.
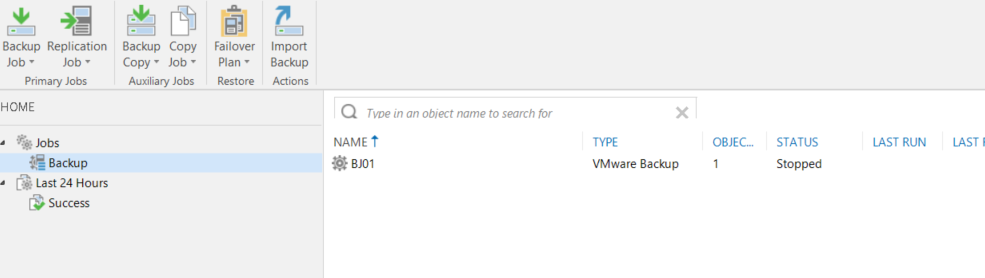
As always, the selection of the backup repository is configured per job. So, you can create a new job or edit an existing job and select the new NFS backup repository.
Optional NFS scale out repository for Veeam – Additional throughput & resiliency
One way to further improve throughput and resiliency for the NFS protocol is to implement an NFS Scale-Out repository within Veeam. The scale out repository will aggregate multiple data VIPs and/or NFS file systems from the SC into a single logical repository that is capable of accepting network traffic from a wider range of NFS mount points.
A scale-out NFS repository, that is spread across multiple SC virtual IP addresses and Veeam gateway servers, can offer increased throughput and resiliency as the scale-out implementation increases the number of data paths between Veeam and SC.
Obviously, there are some overheads to consider when deploying Veeam NFS gateway servers as so many customers will simply leverage their existing Veeam proxies.
Implementation of a scale-out repository is very straight forward. You need at least two or more NFS repositories for SC, created using the above-mentioned process, and then the multiple NFS extents are added to a single scale-out repository.
Summary
In this blog, we’ve explained how to
- Configure an NFS share using StoneFly SCVM
- Add this NFS share as a backup repository within Veeam
Veeam customers who avoided NFS repositories in the past due to the required complexities can rest assured that the process has been greatly simplified in v10.
Similarly, Veeam customers who previously settled for SMB should consider switching to NFS as it offers several advantages over SMB such as better performance in most instances and trusted-host authentication compared to SMBs user-password authentication method.
Did you know that StoneFly’s Storage Concentrator Virtual Machine (SCVM) is available as a standalone software? You can purchase it and install it on VMware vSphere, Microsoft Hyper-V, KVM, and Citrix (XenServer). (Download)
Relevant Resources:
StoneFly’s Veeam-Ready Backup & DR Appliance
StoneFly Storage Concentrator Virtual Machine (SCVM)

")