This article is meant to guide you through the process of deploying software defined storage solution SCVM on VMware ESXi. This article is for the enterprises that have VMware ESX 5.x/6.x installed, on the node on which the SCVM is to be deployed. The step by step process is explained in the article to deploy software defined Virtual Machine (SCVM).
Requirement before installation
The following are the prerequisites for installing a new SCVM:
1. VMware ESX 5.x/6.x is already installed on the node on which the SCVM is to be deployed. vSphere Client is used to configure the ESXi hypervisor.
2. 4 GB or more of free memory available for use by the SCVM.
3. Powerful CPU(s) (Intel Xeon or equivalent is recommended)
4. A minimum of 24 GB of storage for loading the StoneFly StoneFusion
5. Two virtual networks defined in VMware ESXi server: One for the LAN, and another for the SAN. There must be at least one physical interface reserved for each network.
6. Additional storage space (internal or external) to be managed by the SCVM
7. SCVM package (SCVM software CD, documents, and additional files)
Deploying SCVM
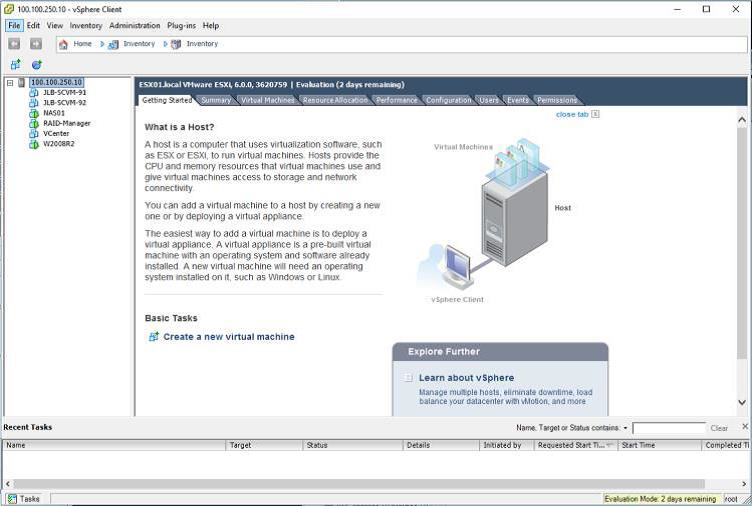
1. Login to VSphere or VCenter. Select the host to add new virtual machine to. Right click and select New Virtual Machine
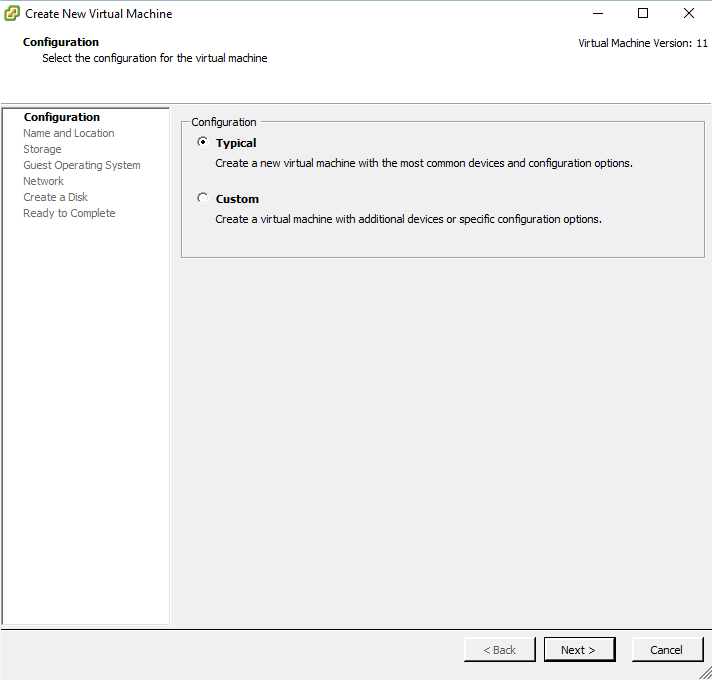
2. Select Typical and click on Next.
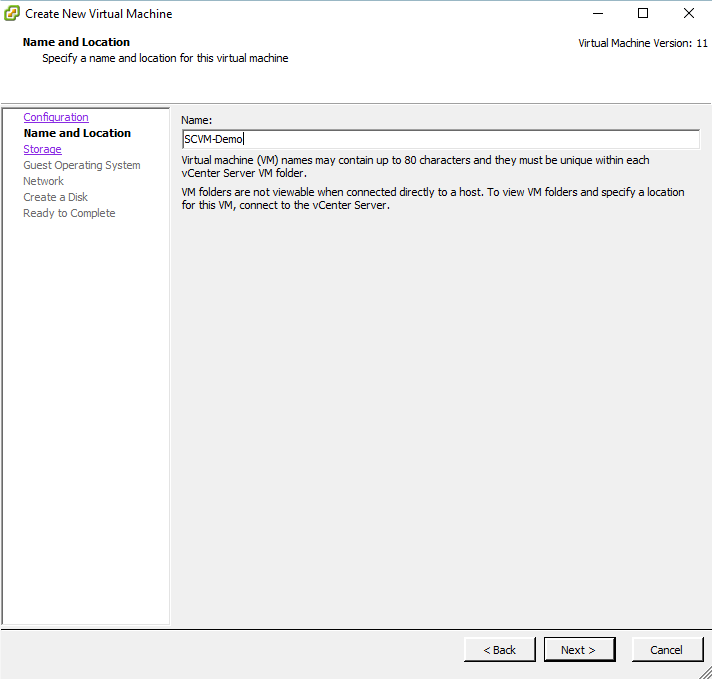
3. Enter a system name in the Name: field and click Next
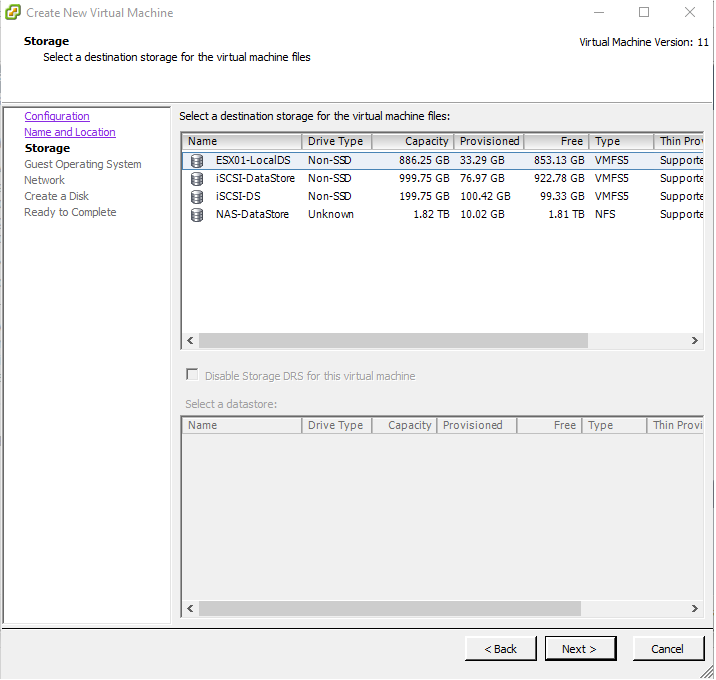
4. Select a Data Store to use for the System OS disk. This selection will vary depending on the specific configuration. If this is a standalone configuration, a local data store can be selected. If this is an ESXi Cluster configuration, a shared data store would be used so migration is possible. In this example a standalone configuration is being used.
Once the selection is made click Next to continue.
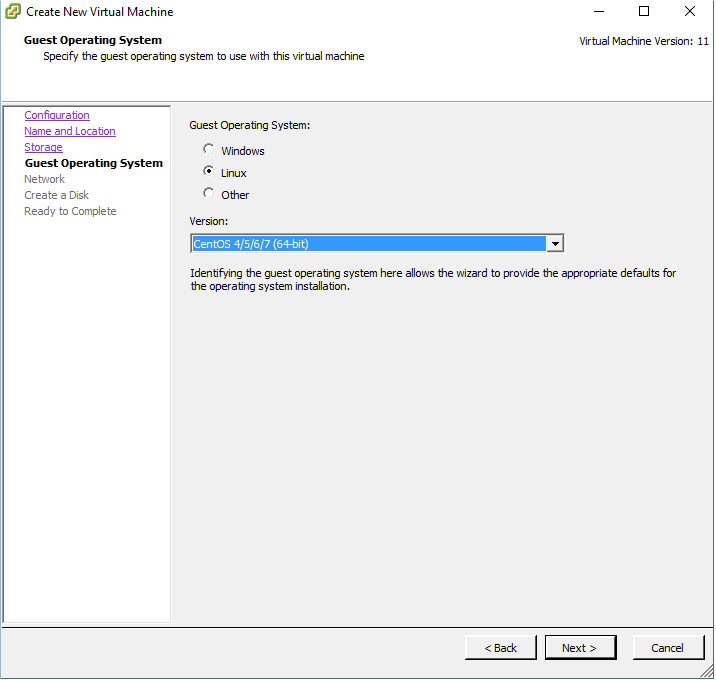
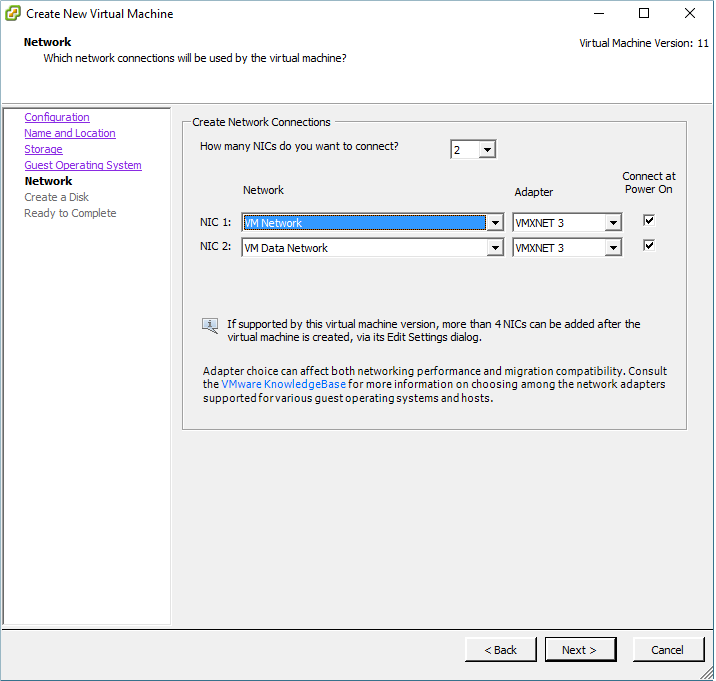
6. Enter 2 for “How many NIC’s do you want to connect?”. For “NIC 1:” select management network. For “NIC 2:” select data network. Next, assign the Adapters from the dropdown menu. Be sure to check both check boxes to “Connect at Power On”. Keep in mind, the order of the NIC’s is important. Click on Next to continue.
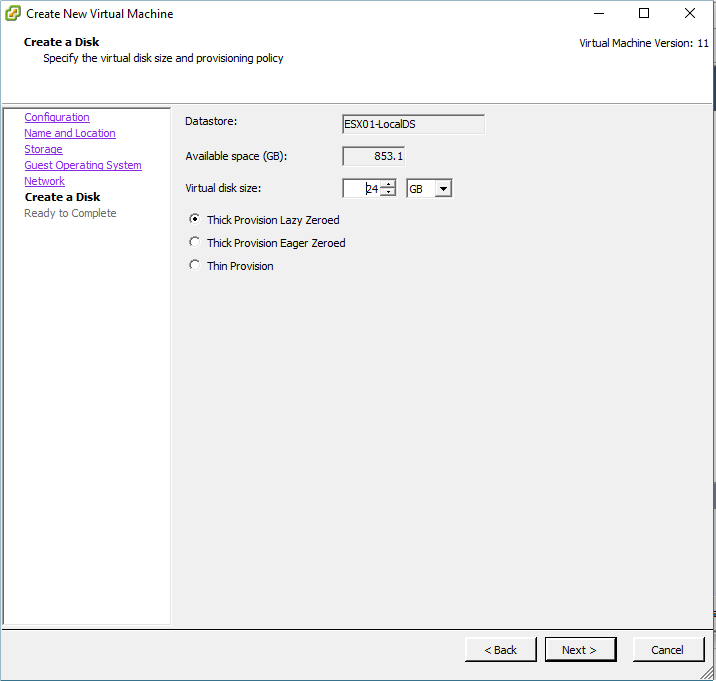
7. The minimum OS disk size is 24GB for a base system. Features that require larger OS disk sizes are Deduplication and NAS Volumes. Select the “Virtual Disk Size”. Click on the Thick Provision Lazy Zeroed radio button and click Next to continue.
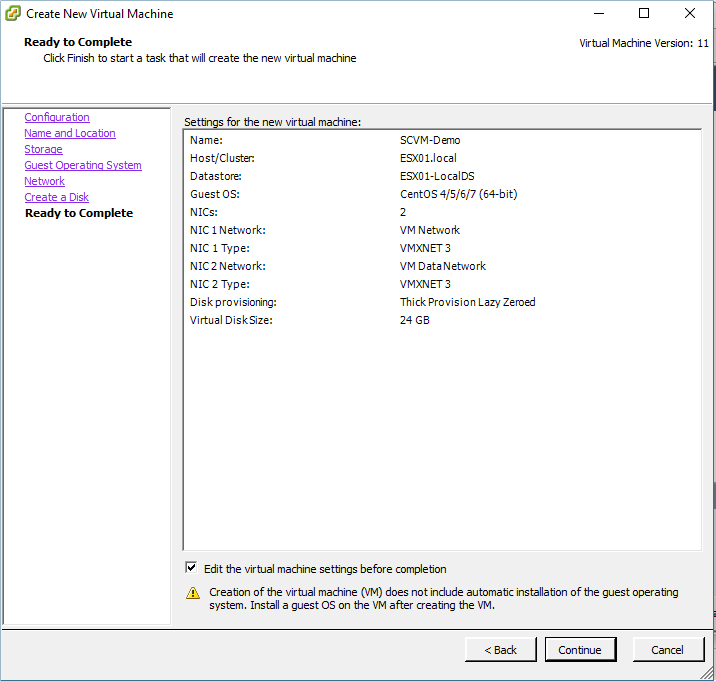
8. Check the Edit the virtual machine settings before completion box. Click on Continue.
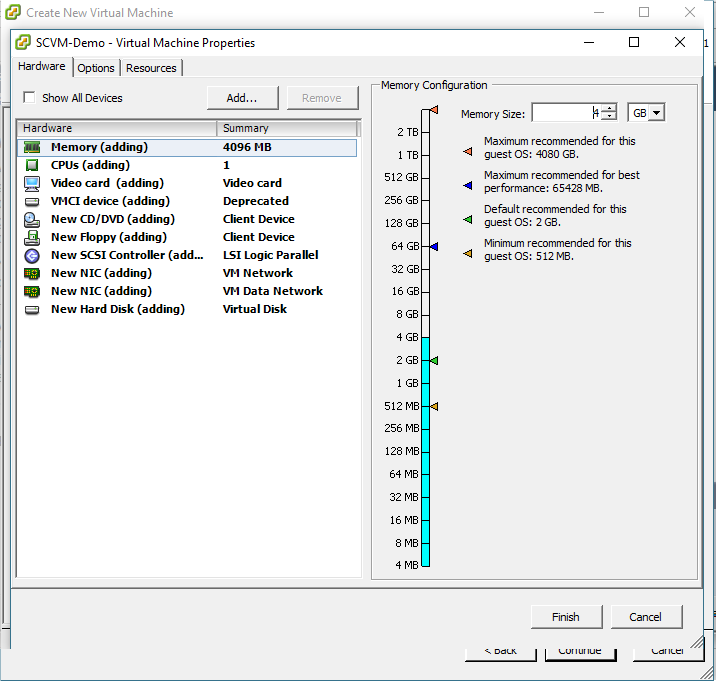
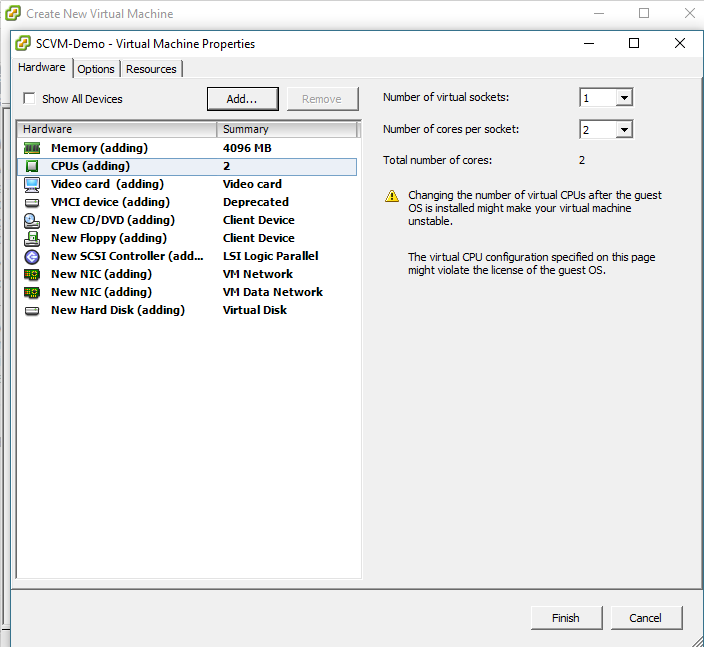
9. Click on Memory and adjust to 4GB for a base system. Use 6GB for systems using encryption. Systems using deduplication require a larger memory size. This setting can be changed at any time.
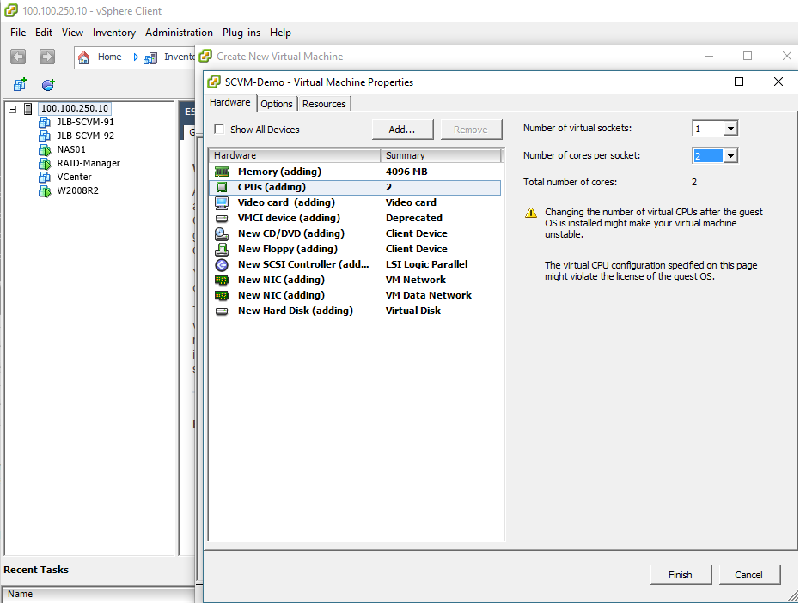
10. Click on CPUs and select number of CPUs to use. The number of CPUs will have an effect on performance. The greater number of CPUs allocated to the workload, the higher the performance will be. These resources can be monitored and re-provisioned later. 2 CPUs are recommended for a base system. This can be set using “Number of virtual sockets:” and “Number of cores per socket:” fields.
11. Click the Add… button
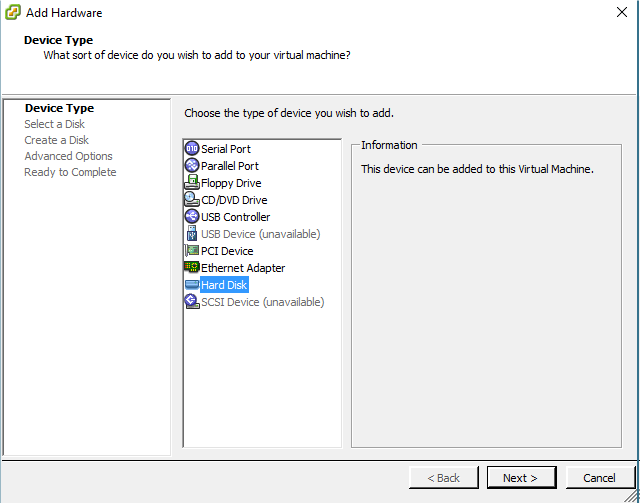
12. Select Hard Disk and then click Next
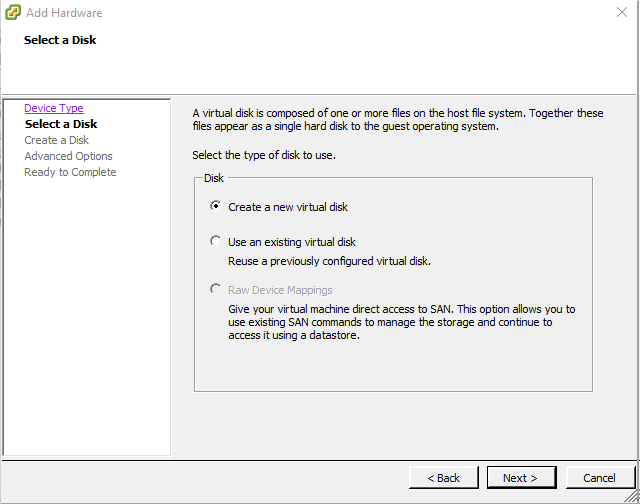
13. Select the Create a new virtual disk radio button and then click Next.
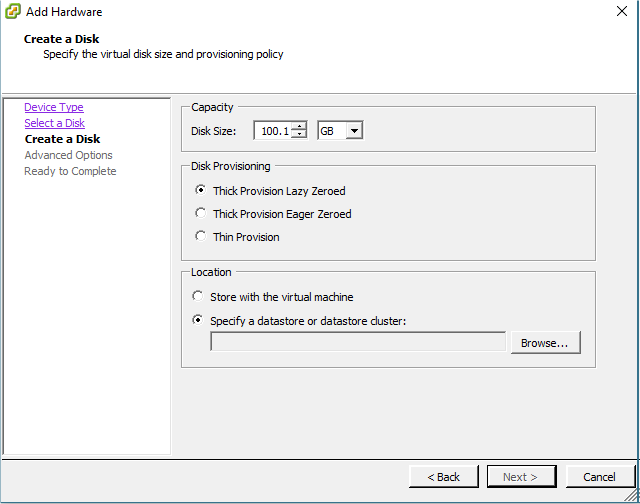
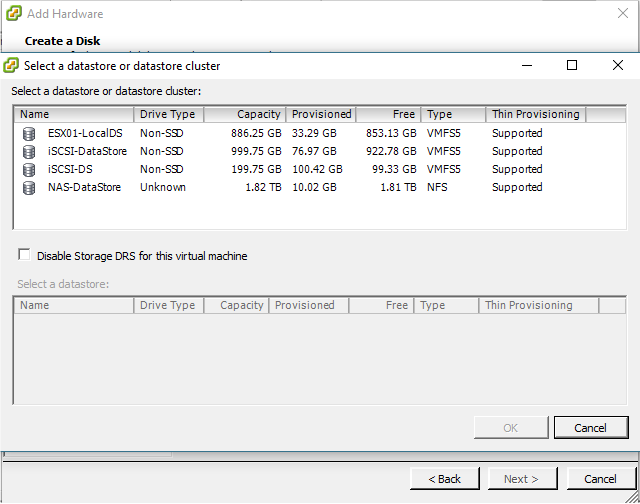
14. SCVM uses the first 64KB of any disk added. Make sure to add this to the required space when creating a new disk. Enter a “disk size”. In this example 100.1GB disk will be created. This allows for 100GB of usable disk plus the overhead. Set “Disk Provisioning” to Thick Provision Lazy Zeroed. Select Specify a Datastore or Datastore cluster and click Browse to select the Datastore to use. In this example, the data store selected is “iSCSI-DataStore”. Click Next to continue.
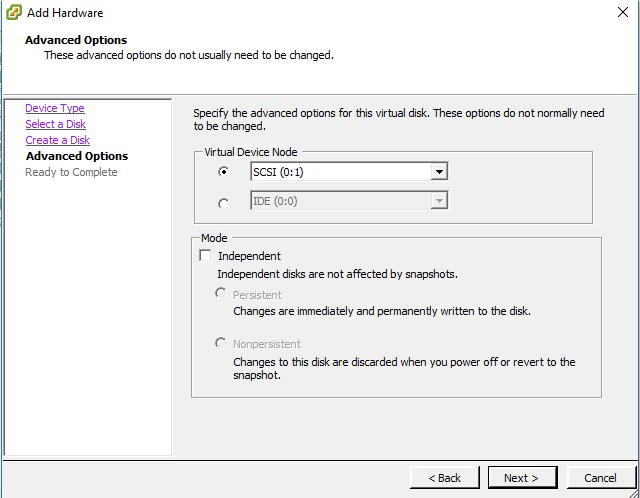
15. Select “Virtual Device Node” choose SCSI. This is usually the default setting. Select Independent for the “Mode” and click Next to continue.
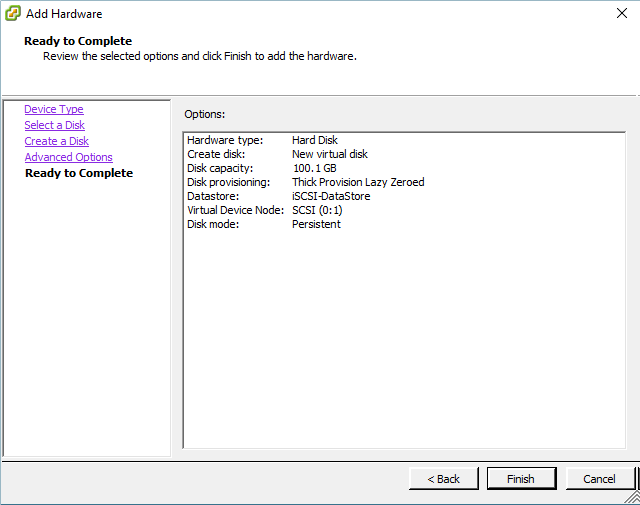
17. Review the settings and click Finish. Now, you have successfully added a new SCVM to your system. Congratulations!
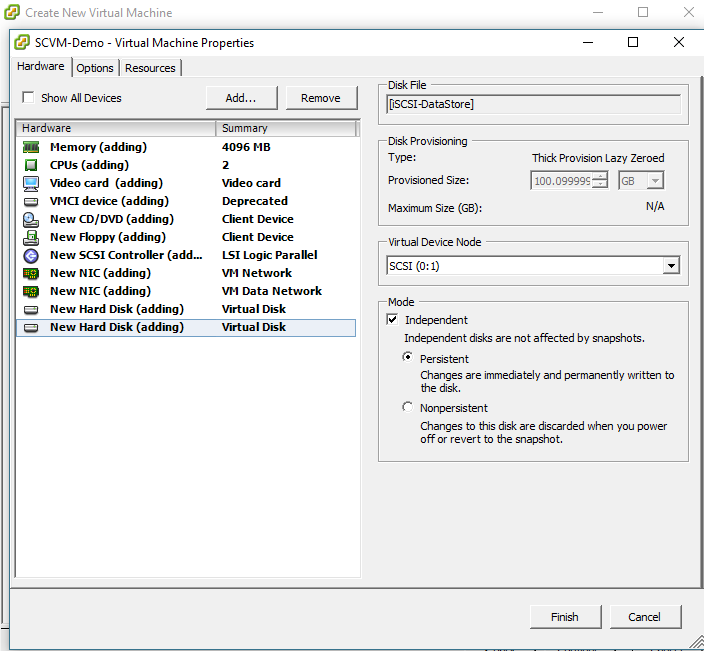
18. In order to activate it, you must select the new virtual machine and power it on.
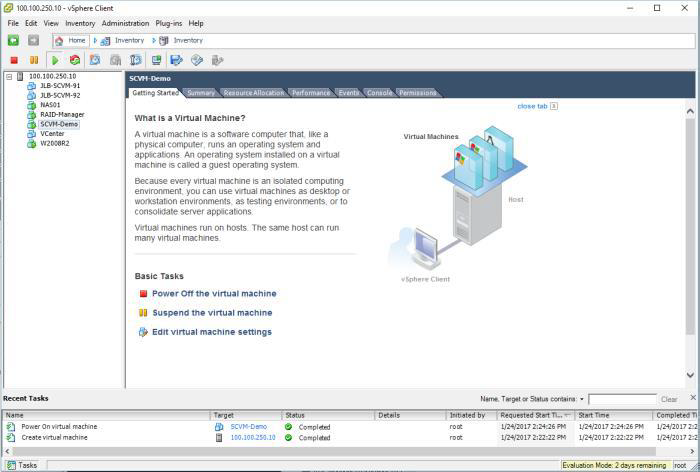
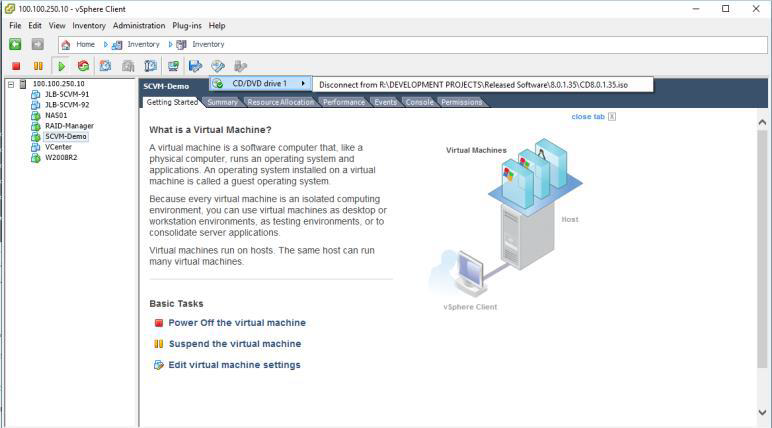
19. Click on the CD ICON in the VSphere Client and select the source for either CD or IOS. In this example the ISO image is selected for the install.
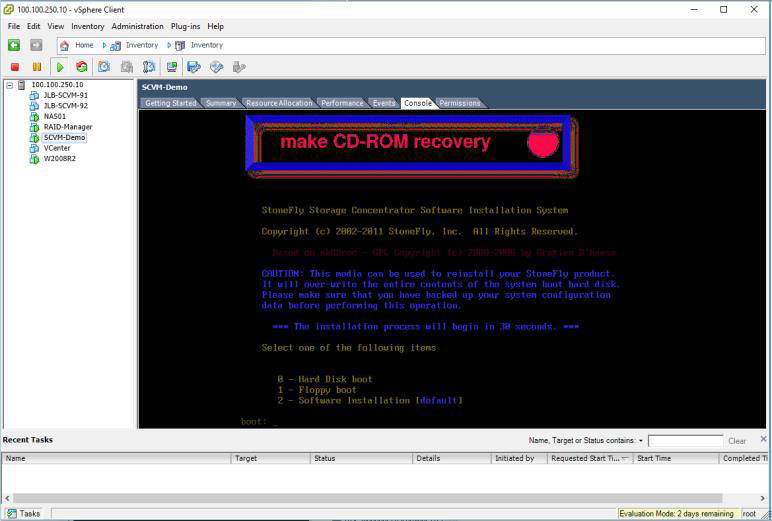
20. Click on the Console tab for console access. Press Ctrl + Alt + Insert keys to start reboot. The screen below appears when the installation starts.
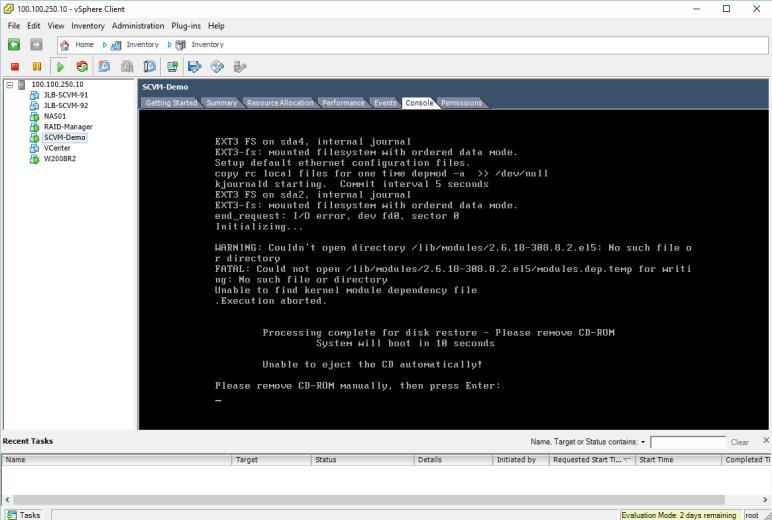
21. After the installation has completed, the message Please remove CD-ROM manually, then press enter will be appear at the bottom of the console. Click on the CD Icon and disconnect from the drive or ISO. Accept the VMWare disconnect messages and click on console panel and press the Enter. The system will reboot, please wait for the reboot to complete before doing anything else.
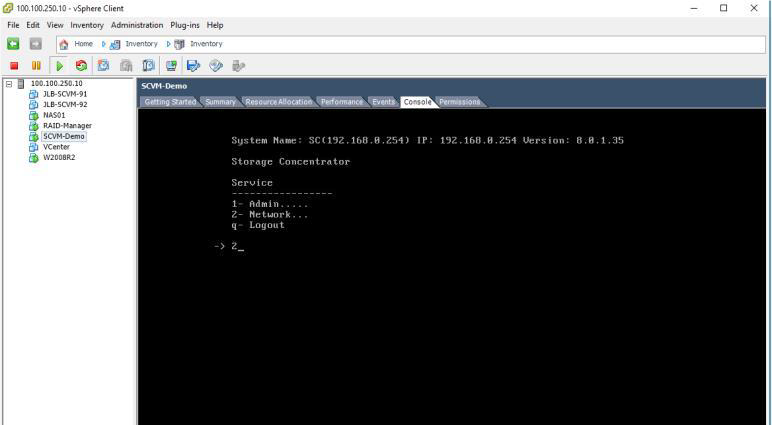
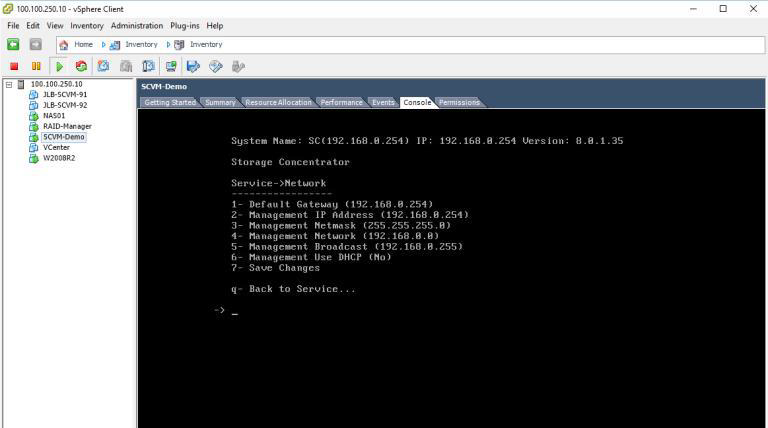
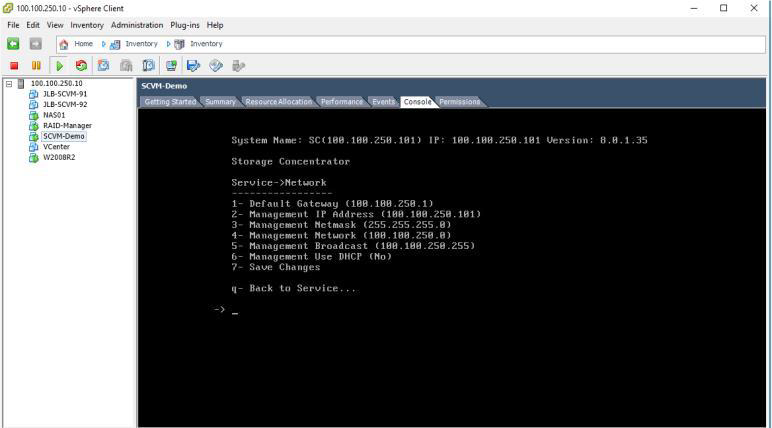
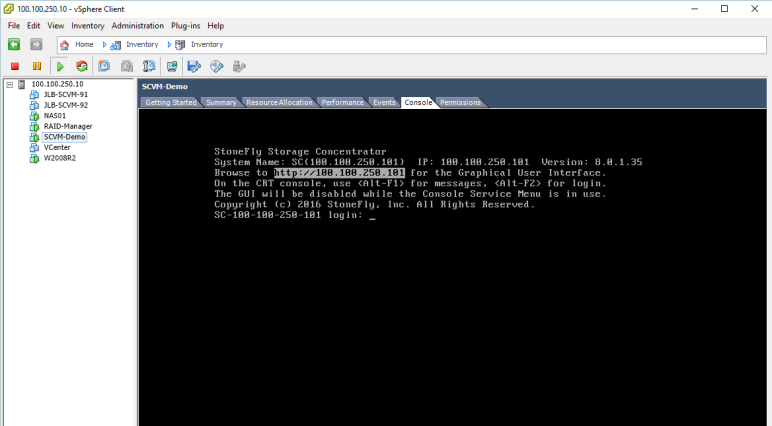
22. Wait for the system to complete rebooting. Login to the user console menu using UserID: console and Password: This starts the user service menu. Enter 2 at the -> prompt to configure the Network. Adjust settings as needed then Save the changes. Enter “q” at the command prompt to exit back to the service menu. Enter “q” again to exit out of the user console service.
This concludes the article, by doing these steps you can deploy your virtual storage solution SCVM on VMware ESXi. The next article will guide you how to configure SCVM. If you have any questions, don’t hesitate to contact us.
